
Contents
When stormwater enters your property, you need to act quickly and follow the right sequence. Damage water extraction begins by checking for electrical and structural hazards and shutting off utilities only when it’s safe to do so. Next, remove standing water, protect valuables, and begin drying affected materials to help limit further damage and reduce mold risk. Hidden moisture can continue damaging walls and floors long after visible water is gone, so thorough moisture checks and timely cleanup are essential to preventing more costly repairs.
Key Takeaways
- Shut off electricity, gas, and water before entering flooded areas to reduce electrical, fire, and contamination risks.
- Remove standing water fast with wet/dry vacuums, pumps, mops, and squeegees, starting at the lowest point.
- Open baseboards, lift carpet edges, and use dehumidifiers and air movers to dry hidden moisture.
- Clean hard surfaces, disinfect properly, and watch for mold growth in damp or hidden areas.
- Document damage with photos and receipts, then contact water extraction professionals for thorough cleanup.
Check Safety Before Extracting Water
Before you start extracting water, check the area for electrical hazards, structural damage, and contaminated standing water. You should wear safety equipment, including waterproof boots, gloves, eye protection, and a respirator if mold or debris is present.
Look for sagging ceilings, warped floors, and broken materials that can trap you or collapse under load. Keep children, pets, and untrained helpers out of the space so your team stays focused and safe.
If the water smells foul or contains debris, treat it as contaminated and limit contact. Keep emergency contacts ready, including utility providers, local authorities, and your restoration lead, so you can report hazards fast.
When you verify the space is stable, you’ll protect yourself and help your crew work with confidence and precision.
Shut Off Utilities and Stop the Flood
Once the area is safe, shut off electricity, gas, and water at the main controls to stop the damage from spreading.
You protect your home and your crew by following emergency procedures in the right order: disconnect power first if water is near outlets, then close the gas valve if you smell fuel or see damage, and finally stop incoming water at the meter or main line.
Use utility management checks to confirm each system is isolated before you enter affected rooms.
Keep family members and neighbors clear of the controls so no one restores service by accident.
If a shutoff feels stuck, call the utility company or a licensed technician.
This quick action limits hazards, supports your recovery team, and keeps everyone aligned while you prepare for the next step.
Remove Standing Water Fast
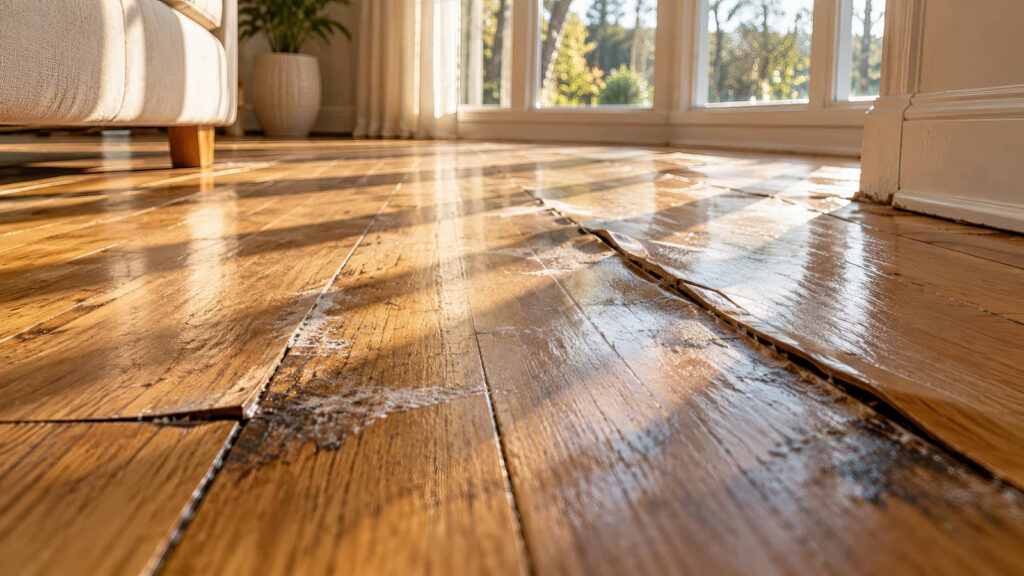
Start removing standing water as soon as the area is safe, because every hour of delay increases drywall swelling, floor warping, and microbial growth.
You should use extraction methods matched to the depth and surface type: a wet/dry vacuum for thin layers, a submersible pump for deeper standing water, and mops or squeegees to pull residue toward drains.
Work from the lowest point outward, and empty equipment before suction drops. Keep power cords elevated and dry while you move methodically through each zone.
If you’re part of a recovery team, communicate clearly so everyone stays aligned and efficient.
Finish by checking corners, baseboards, and under trim, where hidden water often lingers and can keep damage spreading.
Move Furniture and Valuables Out
Move furniture, electronics, rugs, and other valuables out of the wet area as soon as you can safely reach them, because moisture keeps spreading into upholstery, wood, and stored contents.
Prioritize items on blocks, casters, or legs, then lift them with help to reduce strain and prevent frame damage. Set each piece on a clean, dry surface away from pooled water.
For furniture protection, cover only after removal, using breathable materials that won’t trap dampness. Use labeled bins or shelves for valuable storage so small items stay organized and easy to account for.
If an item is too heavy, isolate it with supports and protect nearby flooring with plastic or towels.
Work methodically with your team, keep pathways clear, and document moved items for quick restoration later.
Dry Walls and Floors Completely
After you remove standing water, dry walls and floors completely to stop hidden moisture from feeding mold, swelling, and structural damage.
You should open baseboards, lift wet carpet edges, and expose wall cavities where possible so air can reach trapped moisture. Use drying techniques that match the material: clean drywall, hardwood, tile, and subflooring each need different airflow and surface treatment.
Check seams, corners, and insulation pockets with a moisture meter, not just touch. Keep humidity control tight by ventilating the space and sealing off damp rooms from clean ones.
You’re part of a team here, and thorough drying protects everyone’s home, health, and repair budget. Don’t rush the process; complete dryness prevents delayed failures and keeps the space safe for rebuilding.
Run Dehumidifiers to Remove Moisture
Once the visible water is gone, run dehumidifiers to pull residual moisture out of the air and materials.
Choose dehumidifier types based on room size, temperature, and how wet the space still feels. Refrigerant units work well in warm, humid rooms, while desiccant models help in cooler conditions.
Place each unit near the dampest area, keep doors and windows closed, and let air circulate with fans so moisture control stays efficient.
Empty or drain collection tanks on schedule, or use continuous drainage if you can.
Check humidity with a meter and aim for a steady drop each day.
You’re not just drying a room; you’re restoring your space with a method that keeps everyone safer and more comfortable.
Watch for Mold During Drying
As materials dry, watch closely for mold growth in dark, damp, or hidden areas like behind baseboards, under flooring, and inside wall cavities. You’ll protect your home faster when you inspect daily with a flashlight and a moisture meter.
Look for musty odors, staining, fuzzy patches, and soft drywall, since different mold types can appear within 24 to 48 hours. Keep airflow steady, replace wet insulation, and track humidity so surfaces don’t stay above safe levels.
If one room dries slower, isolate it and increase circulation there. Your prevention strategies work best when you document changes, note problem spots, and act before colonies spread.
Stay alert, stay coordinated, and you’ll help your crew keep the space safe, dry, and ready for next steps.
Sanitize Surfaces After Flood Cleanup
After flood cleanup, you should disinfect all hard surfaces with a solution that’s safe for the material and strong enough to remove contaminants.
Clean and dry each area completely to limit mold growth and prevent residual moisture from spreading.
Use approved cleaning solutions, follow contact times exactly, and replace anything porous that can’t be sanitized.
Surface Disinfection Methods
Before you disinfect, clean every visible trace of mud, debris, and residue, because disinfectants work best on surfaces that are already washed and dried.
Then choose the right chemical disinfectants for the material: use labeled products for hard, nonporous surfaces, and follow the stated contact time exactly.
Wear gloves, ventilate the area, and mix solutions only as directed.
If you prefer natural alternatives, use them only on lightly affected, noncritical surfaces; they’re less reliable than approved disinfectants.
Apply the solution evenly with a clean cloth or sprayer, keep the surface visibly wet for the full dwell time, and wipe with fresh towels.
You’re not alone in this cleanup; careful, methodical disinfection helps your space feel safe, familiar, and ready for the next step.
Mold Prevention Steps
Once you’ve removed standing water and cleared away debris, sanitize every flood-affected surface to slow mold growth and eliminate lingering contaminants. You’ll protect your space and keep your crew safe by acting fast.
- Remove porous items that can’t be fully dried.
- Wipe hard surfaces with a clean cloth to lift residue.
- Dry walls, floors, and framing with steady airflow and humidity control.
- Inspect hidden cavities for trapped moisture that can feed mold spores.
Work methodically from the highest-risk areas to the lowest, and don’t leave damp materials stacked together.
Keep the area ventilated, monitor moisture levels daily, and recheck surfaces after 24 hours.
When you stay consistent, you reduce recontamination and help your property return to a stable, healthy condition.
Safe Cleaning Solutions
Choose a cleaning solution that matches the surface and the contamination level, then apply it with proper dwell time so it can actually sanitize.
You should wear gloves, eye protection, and a respirator if residue or sewage is present.
For nonporous surfaces, use a labeled disinfectant or diluted bleach solution that fits the manufacturer’s ratio.
Test eco-friendly options on a hidden spot first, since vinegar and peroxide won’t sanitize every flood surface.
Avoid homemade cleaners for porous materials, because they can leave moisture behind and weaken protection.
Scrub visible soil off before disinfecting, then keep the surface wet for the full contact time.
Rinse food-contact areas, dry them completely, and ventilate the room so your cleanup team stays safer together.
Document Damage for Insurance
Capture the damage as soon as it’s safe to do so, because clear documentation can speed up your insurance claim and support your loss assessment. You’re protecting your household’s recovery team by creating accurate damage documentation for insurance claims.
Use these steps:
- Take dated photo evidence of every affected room, wall, floor, and personal item.
- Record water lines, material saturation, and visible structural changes with brief notes.
- Save repair estimates, receipts, and policy coverage details in one file.
- Track every call, email, and message with your insurer using tight communication tips.
This claim process works best when you keep files organized and share facts, not guesses. Your documentation helps adjusters verify losses, and it shows you’re handling the situation with the same care your neighbors would expect.
Call Water Extraction Pros
After you’ve documented the damage, call a water extraction pro so the cleanup starts with the right equipment and moisture readings.
You’ll want fast water extraction to limit swelling, mold growth, and hidden structural damage. Professional services use truck-mounted pumps, air movers, and hygrometers to remove standing water, dry cavities, and verify safe humidity levels.
You can ask the team to map affected rooms, inspect under flooring, and explain each drying phase before work begins. That keeps you informed and confident.
If you’re dealing with stormwater, choose a crew trained for contaminated exposure and disposal. Their process should include containment, sanitation, and daily moisture checks.
With the right team, you’re not handling the problem alone; you’re joining neighbors who’ve restored homes the right way.
Frequently Asked Questions
How Long Should Stormwater Remain Before Structural Damage Begins?
Structural damage can begin within 24 to 48 hours if you leave stormwater standing, especially with water seepage into framing and subfloors. You should extract it fast to protect your home, your crew, and your investment.
Can Carpet Padding Be Salvaged After Floodwater Exposure?
Usually no; you shouldn’t salvage carpet padding after floodwater exposure. You’ll get better results with carpet drying techniques on the carpet only, then choose padding replacement options to prevent mold, odors, and hidden contamination.
What Signs Indicate Hidden Water Inside Walls or Ceilings?
You’ll notice hidden water by staining, bubbling paint, warped drywall, musty odors, cool damp spots, and soft ceilings. During wall inspections, check hidden moisture with a meter, then monitor readings and repair leaks fast.
How Soon Should Insurance Be Notified After Storm Flooding?
You should notify insurance immediately, ideally within 24 hours, so your insurance claims start promptly and damage assessment stays accurate. Acting fast helps you protect your coverage, avoid delays, and keep your recovery process on track.
Are There Special Precautions for Sewage-Contaminated Stormwater?
Yes—treat sewage-contaminated stormwater as hazardous. You should wear gloves, boots, and eye protection, isolate the area, avoid skin contact, disinfect thoroughly, and manage contamination risks fast. Follow sewage safety protocols and keep others out.
Recap
Stormwater can turn your home into a soaked disaster zone in minutes, so you need to act fast. Check safety first, shut off utilities, and pump out standing water before it spreads like wildfire. Move valuables, dry every surface, and watch for mold as if it could appear overnight—because it can. Sanitize thoroughly, document every detail, and call water extraction pros when the job’s too big to tackle safely.
Recent Posts
Why Storm Damage Extraction Services Matter
When storm water gets into your property, damage can escalate faster than you’d expect. You
5 Mold Remediation Steps After a Backup
Many homes that experience a sewage backup develop mold within days when moisture and contamination
Why Remediate Mold After Sewage Backup?
You need to clean, dry, and disinfect after a sewage backup, and you need to