
Contents
After flooding, you need to act fast to limit mold growth and structural damage. Shut off the water, inspect hidden areas, and dry everything thoroughly before moisture spreads. Then decide what you can save, remove materials that won’t recover, and disinfect all remaining surfaces. If the contamination is extensive, you’ll want a qualified remediation team. The right sequence matters, and one mistake can make the cleanup far more difficult.
Key Takeaways
- Shut off the water source, unplug affected circuits, and document damage immediately for insurance and cleanup planning.
- Inspect wet areas within 24–48 hours for mold, especially drywall, baseboards, carpet backing, insulation, and hidden cavities.
- Dry the space fast with fans, dehumidifiers, and strong ventilation, while monitoring moisture until materials are fully dry.
- Clean hard surfaces with hot water, detergent, and disinfectant, and discard materials with irreversible contamination or structural damage.
- Hire a licensed mold remediation team for large or persistent growth, and verify post-remediation inspection and moisture control.
Stop the Water Damage Fast
Act quickly to stop the water source and limit further intrusion, because every additional minute increases the risk of mold growth. You should shut off the main valve, unplug affected circuits, and move belongings out of standing water.
If the leak came from storms or a broken pipe, document conditions for water damage insurance and contact your provider promptly. Then deploy flood prevention strategies such as sandbags, backflow valves, and sealed door thresholds to reduce repeat entry.
You belong to a community that acts decisively, so coordinate with neighbors, plumbers, or restoration teams if the source isn’t obvious. Open windows only if outdoor conditions are dry, and use pumps or wet vacs to remove water fast.
Your goal is simple: stabilize the structure before hidden damage spreads.
Inspect for Mold After Flooding
Once the water is contained, inspect every affected area for mold within 24 to 48 hours, because spores can start colonizing damp materials quickly.
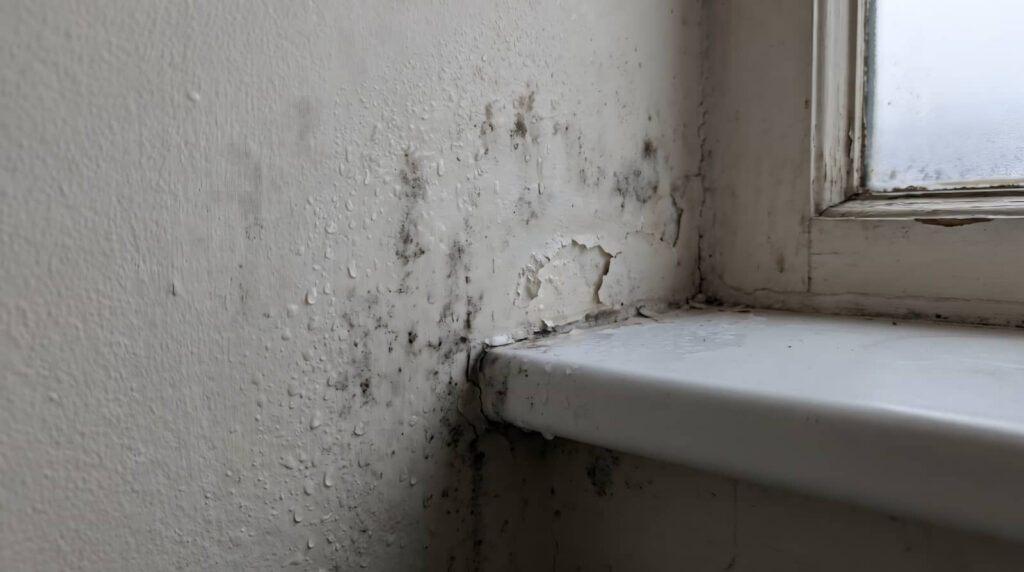
You should check baseboards, drywall seams, insulation, carpet backing, and hidden cavities with a flashlight and mirror. Look for visible growth, staining, musty odors, and moisture patterns that signal active contamination.
Different mold types may appear as black, green, white, or gray patches, so don’t rely on color alone. Document each finding with photos and notes, then isolate suspect areas from clean spaces to protect your household.
If you notice widespread growth, call a qualified remediator promptly. This careful inspection helps you identify health risks early and keeps your recovery team aligned, informed, and ready to act.
Dry the Building Thoroughly
Move quickly to dry the structure completely, because mold can keep spreading anywhere moisture remains. You should treat drying as a coordinated moisture control task, not a cleanup afterthought.
Open pathways for airflow, position fans to move air across wet surfaces, and use dehumidifiers to pull vapor from the indoor environment. Strong ventilation strategies help you reduce humidity and stabilize conditions fast.
- Set high-velocity air movers along walls and floors.
- Run dehumidifiers continuously until readings drop.
- Check hidden cavities, corners, and subfloors for dampness.
You need dry, stable air to protect your space and your team’s recovery effort. Keep measuring moisture levels, adjust equipment as needed, and don’t stop until the building feels uniformly dry and safe.
Identify What Can Be Saved
You need to assess damage quickly so you can determine which materials still have structural integrity and which do not.
Separate salvageable items from contaminated contents immediately, using objective criteria such as material type, duration of exposure, and visible mold growth.
Discard any unsafe materials, including porous items that stayed wet too long or show irreversible microbial contamination.
Assess Damage Quickly
Inspect flood-damaged areas within the first 24 hours, because rapid evaluation helps limit mold growth and preserves salvageable materials. You need to move fast, document visible damage, and verify moisture control before conditions worsen.
Your quick assessment should focus on structure, surfaces, and contents that still hold value for your household.
Check drywall, baseboards, and insulation for swelling or staining.
Test floors and framing for soft spots, warping, or hidden dampness.
Note items with intact finishes, no odor, and minimal water exposure.
You belong to a group of homeowners who act decisively, and that discipline reduces spread. Mark anything saturated, then judge whether drying can succeed without risking mold growth.
Keep your inspection systematic, because precision now protects recovery later.
Separate Salvageable Items
Separate salvageable items immediately by sorting contents into keep, clean, and discard groups before mold has time to spread. You’ll protect your home’s recovery by using item evaluation and damage assessment to determine which materials still have structural integrity, stable finishes, and minimal contamination.
Check hard goods, sealed containers, and nonporous surfaces first, since they often respond best to cleaning and drying. Mark each item with a location tag so you can track where it belongs and prevent cross-contamination. Photograph items before moving them, and record moisture exposure, odor, and visible staining.
This process helps your crew work efficiently and keeps everyone aligned. When you identify keepable items early, you reduce losses, speed restoration, and regain control with confidence.
Discard Unsafe Materials
After sorting items into keep, clean, and discard groups, remove anything that’s no longer safe to save before mold can spread further. You protect your space by acting fast and following mold safety standards. Discard porous materials that stayed wet longer than 48 hours, including drywall, insulation, carpet, and ceiling tiles.
Stack damaged gypsum board beside the wall.
Bag saturated fabric and paper in sealed liners.
Set warped particleboard and foam apart for pickup.
If an item smells musty, crumbles, or shows visible growth, don’t try to salvage it. Use gloves, eye protection, and an N95 respirator during handling.
Place debris in labeled bags, then arrange prompt material disposal through local waste rules. By removing unsafe contents now, you help your household stay healthier and ready for restoration.
Remove Unsalvageable Mold-Damaged Materials
Pull out and discard any porous materials that show extensive mold growth or water damage and can’t be fully cleaned and dried.
You should remove drywall, insulation, carpet padding, ceiling tiles, and swollen particleboard as part of disciplined mold removal. Seal debris in heavy-duty bags before moving it through the home, and keep the path clear so spores don’t spread.
Wear gloves, eye protection, and an N95 respirator to reduce health risks while you work. If material crumbles, stains deeply, or retains a musty odor after drying, treat it as unsalvageable.
You’re protecting your household and restoring a safer environment when you act decisively. Group each load separately, label it if needed, and dispose of it according to local waste rules.
Clean and Disinfect All Surfaces
Scrub all remaining hard surfaces with hot water and detergent to remove visible dirt, then apply a disinfectant labeled for mold cleanup and follow the full contact time on the product instructions.
Your cleaning techniques should target counters, shelves, and trim, because thorough surface sanitization lowers the chance of lingering spores. Work from the cleanest area to the dirtiest, and use fresh cloths so you don’t spread residue.
- Wipe walls with firm, overlapping strokes.
- Rinse tile and fixtures until they feel clear, not slick.
- Dry every surface with airflow and clean towels.
You’re protecting your space and helping your household get back to normal. Keep gloves on, ventilate the room, and repeat surface sanitization on any spot that still shows staining or film.
Call a Professional Mold Remediation Team
If mold growth covers a large area, keeps returning, or has spread into wall cavities, you should call a professional mold remediation team to inspect, contain, and remove it safely.
You’ll get trained technicians who use moisture meters, HEPA filtration, and negative-air containment to limit spore spread. They can identify hidden damage, remove contaminated materials, and dry the structure to support mold prevention.
This step also helps restore air quality, which matters if you and your family are returning to the space.
Choose a licensed team with flood recovery experience, clear protocols, and documented post-remediation verification. Their process gives you a safer, more reliable result than spot cleaning alone, and it helps you reoccupy your home with confidence.
Frequently Asked Questions
How Soon Does Mold Start Growing After Flooding?
Mold can start growing within 24 to 48 hours after flooding if you don’t dry materials fast. You can cut the mold growth timeline and improve flood damage prevention by removing water, ventilating, and dehumidifying immediately.
What Health Symptoms Can Mold Exposure Cause?
It can feel like your body’s sounding an alarm: you may get mold allergies, respiratory issues, skin irritation, chronic fatigue, neurological symptoms, and a strong immune response. You’re not overreacting—these symptoms can escalate fast.
Is Bleach Effective for All Mold Types?
No, bleach isn’t effective for all mold types; you’ll often need bleach alternatives. You can kill surface growth on nonporous materials, but porous materials may retain colonies, so you should remove and replace them.
Should HVAC Systems Be Inspected for Hidden Mold?
Yes, you should inspect HVAC systems for hidden mold, because ducts can spread spores. Schedule HVAC maintenance and Mold detection after flooding; you’ll protect air quality, reduce contamination, and keep your space safe and healthy.
Can Flood Insurance Cover Mold Remediation Costs?
Yes, flood insurance can cover mold remediation costs when your insurance policy details include sudden water damage. Like a locked gate opening, you’ll check mold prevention strategies, document damage, and act fast to qualify.
Conclusion
When you stop the leak, inspect carefully, and dry every hidden pocket of moisture, you cut mold off at the source. Think of your home as a ship in stormy water: if you bail fast and strip away damaged cargo, it stays afloat. Clean, disinfect, and replace what cannot be saved, then bring in certified pros when the job’s too large. Act quickly, and you’ll keep mold from turning your recovery into another disaster.
Recent Posts
What Comes Next After Flood Mold Damage?
If your basement flooded after a storm and mold appeared within days, you need to
Why Remediate Mold After Flooding?
If you let mold after flooding go unchecked, it can spread like a hidden system
What Is Flooded Basement Cleanup?
Many flood claims start in the basement, which means you’re often racing against hidden damage