Contents
Imagine you’ve just returned home after a severe storm to find your basement flooded and walls damp with moisture. It’s vital to act quickly and methodically to prevent mold from taking hold. Start by evaluating the damage and documenting everything, but don’t overlook the safety precautions you need to take. Understanding the essential steps for effective mold removal can greatly influence your recovery process and the long-term health of your home.
Key Takeaways
- Inspect all affected areas for water saturation and document findings with photos and notes.
- Remove contaminated materials like carpets and drywall while wearing protective gear.
- Dry the area thoroughly using fans and dehumidifiers to maintain humidity levels between 30-60%.
- Apply mold inhibitors on cleaned surfaces to prevent regrowth, following the manufacturer’s instructions.
- Conduct regular inspections post-restoration to monitor for any signs of mold reappearance.
Assessing the Damage
After a flooding event, it’s vital to thoroughly assess the damage before tackling mold removal.
Start by inspecting all affected areas, including walls, floors, and ceilings. Look for signs of water saturation, as moisture levels will dictate mold growth potential.
Don’t forget to check hidden spots, like behind furniture or inside cabinets, where water might linger unnoticed.
Documenting your findings is important; take photos and make notes of affected materials and their condition.
Pay attention to porous materials—like drywall, carpets, and insulation—as they’re more susceptible to mold.
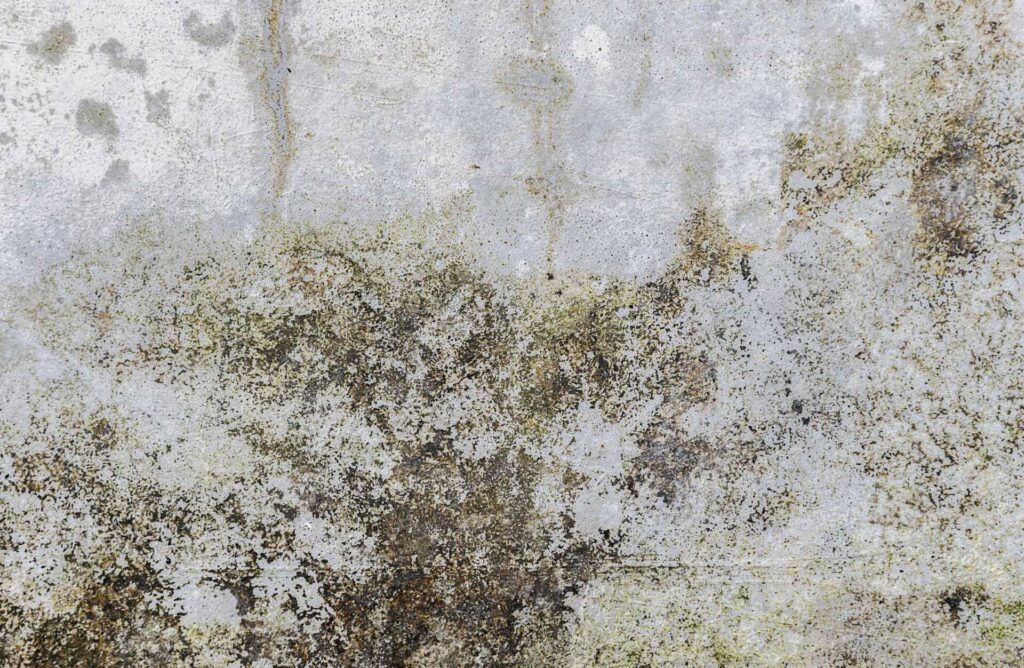
If you notice visible mold growth or a musty smell, it’s a clear indicator that mold removal is necessary.
Evaluating the extent of damage helps you determine whether you can handle the situation or need professional assistance.
Ensuring Safety Precautions
Before you begin the mold removal process, it’s vital to prioritize safety precautions to protect yourself and others in the vicinity. Start by wearing protective gear, including gloves, goggles, and a mask rated for mold spores. This gear helps minimize exposure to potentially harmful allergens and toxins.
Make sure your workspace is well-ventilated; open windows and use fans to circulate air effectively. It’s also important to assess the area for structural integrity. Avoid working in spaces with visible damage, as this could pose additional hazards.
If the mold covers a large area, consider notifying local authorities or hiring professionals for assistance. Keep children and pets away from the affected zones to prevent accidental exposure.
Finally, always have a first aid kit on hand, just in case. By taking these precautions, you protect yourself and foster a safer environment for everyone involved in the cleanup process.
Removing Contaminated Materials
Removing contaminated materials is a critical step in the mold remediation process. After a flood, you’ll likely find items like carpets, drywall, or insulation that have absorbed water and become breeding grounds for mold.
It’s vital to identify and remove these materials promptly to prevent further mold growth. Start by wearing protective gear, including gloves and masks, to shield yourself from harmful spores.
Carefully assess each item for signs of contamination. If an item is porous and heavily affected, like upholstered furniture or carpets, it’s often best to discard it. For non-porous materials, like metal or plastic, you can clean and disinfect them.
Seal contaminated materials in plastic bags to prevent spores from spreading during removal. Dispose of them according to local regulations.
Drying and Dehumidifying Affected Areas
After flooding, you need to assess moisture levels in the affected areas to determine the extent of the damage.
Effective drying techniques, such as using fans and ventilation, play an essential role in expediting the process.
Additionally, utilizing dehumidifiers properly can greatly reduce humidity, preventing mold growth and further structural damage.
Assessing Moisture Levels
Although flooding can leave your home vulnerable to mold growth, evaluating moisture levels is essential for effective remediation. You’ll need to take accurate measurements to ensure all affected areas are addressed. Use a hygrometer to assess humidity levels in various parts of your home, focusing on areas that were submerged.
Consider these key factors during your assessment:
- Check for hidden moisture in walls, floors, and ceilings.
- Monitor humidity levels regularly to track drying progress.
- Identify any areas that remain damp longer than 48 hours.
- Document your findings to guide your drying efforts.
Effective Drying Techniques
To effectively mitigate mold growth, it’s crucial to implement efficient drying techniques immediately after evaluating moisture levels in your home.
Begin by removing standing water using wet vacuums or pumps, ensuring you tackle the most affected areas first. Next, open windows and doors to enhance airflow, creating a cross-breeze that aids drying.
Utilize fans strategically—position them to circulate air throughout the space. For porous materials like carpets and drywall, consider extracting moisture with specialized equipment.
Monitor humidity levels regularly, aiming for 30-60% to inhibit mold growth. Remember, the faster you dry your home, the less chance mold has to settle in.
Taking these steps fosters a healthier environment for you and your loved ones, reinforcing your commitment to a safe home.
Utilizing Dehumidifiers Properly
Once you’ve tackled the initial drying process, utilizing dehumidifiers can greatly enhance your efforts in drying and dehumidifying affected areas.
These devices work by removing excess moisture from the air, which is essential for preventing mold growth. To maximize their effectiveness, consider the following tips:
Choose the right capacity: Opt for a dehumidifier that matches the size of the affected area.
Position strategically: Place it in the center of the room or near sources of moisture for ideal airflow.
Continuous drainage option: Use a hose to drain water continuously, reducing the need for manual emptying.
Monitor humidity levels: Keep an eye on the humidity gauge to make sure it stays below 60%, perfect for mold prevention.
Following these steps will help you create a safer environment.
Cleaning and Disinfecting Surfaces
As you begin the process of cleaning and disinfecting surfaces after flooding, it’s crucial to understand that not all surfaces require the same treatment.
Start with non-porous surfaces like tile, glass, and plastic. Use a mixture of warm water and detergent to scrub away dirt and mold. Rinse thoroughly and then apply a disinfectant solution, following the manufacturer’s instructions for contact time.
For porous materials, like drywall or carpet, you may need to remove and replace them if they’ve absorbed too much water. If you choose to clean these materials, use a specialized cleaner designed for mold removal.
Don’t forget to wear protective gear, such as gloves and masks, to avoid exposure to harmful spores.
Finally, ensure proper ventilation while you clean. This will help dry surfaces quickly and minimize mold regrowth, creating a healthier environment for you and your loved ones.
Applying Mold Inhibitors
After you’ve cleaned and disinfected the affected surfaces, applying mold inhibitors is essential to prevent future growth.
There are various types of mold inhibitors available, each with unique properties and application techniques.
It’s also important to follow safety precautions during application to protect yourself and ensure effectiveness.
Types of Mold Inhibitors
While floodwaters can leave behind a breeding ground for mold, applying the right types of mold inhibitors can effectively mitigate this risk.
You have several options to take into account, each targeting the mold’s growth at different stages.
Chemical Mold Inhibitors: These are commercial products designed specifically to prevent mold spores from settling and growing.
Natural Mold Inhibitors: Ingredients like vinegar, tea tree oil, or baking soda can be safe alternatives for those preferring eco-friendly solutions.
Biocide Solutions: These are potent agents that kill mold spores and are often used in severe infestations.
Sealants: After cleaning, applying sealants can help protect porous materials from moisture and mold regrowth.
Choosing the right inhibitor is essential for long-term prevention and health safety.
Application Techniques Overview
Applying mold inhibitors effectively requires a strategic approach to ensure ideal results in preventing mold growth.
First, verify that the affected area is thoroughly cleaned and dried, as moisture can hinder inhibitor effectiveness.
Next, choose the right application method—spraying, brushing, or rolling—based on the surface texture. For porous materials, like drywall, use a spray to penetrate deeply.
When applying, maintain a consistent distance to verify even coverage, avoiding oversaturation that could lead to drip marks.
Allow the inhibitor to dry completely before reintroducing furnishings or decor.
Finally, monitor the area regularly for signs of mold recurrence, verifying your efforts remain effective.
Taking these steps fosters a mold-free environment and promotes a sense of safety and community.
Safety Precautions Necessary
Before you begin applying mold inhibitors, it’s vital to prioritize safety to protect yourself and others in the vicinity.
Mold removal can expose you to harmful spores and chemicals, so taking precautions is important. Here are some key safety measures to keep in mind:
Wear Protective Gear: Use gloves, goggles, and a mask to shield yourself from mold and irritants.
Ensure Ventilation: Open windows and use fans to keep air circulating, reducing inhalation risks.
Stay Dry: Keep your skin and clothing dry to prevent mold spores from settling.
Keep Others Away: Limit access to the area during treatment to protect those who may be sensitive to mold exposure.
Monitoring for Future Mold Growth
As you restore your home after flooding, it is crucial to monitor for future mold growth to prevent a recurrence of the problem. Regular checks can help you catch mold early, ensuring your home remains a safe space for you and your loved ones.
Here’s a simple table to guide your monitoring efforts:
| Frequency of Check | Areas to Inspect | Signs of Mold |
|---|---|---|
| Weekly | Bathrooms | Visible mold spots |
| Bi-Weekly | Basements | Musty odors |
| Monthly | Attics | Moisture accumulation |
Final Thoughts
Tackling mold removal after flooding isn’t just a choice; it’s essential for your health and safety. You might think the process is overwhelming, but breaking it down into manageable steps makes it achievable. By evaluating damage, ensuring safety, and thoroughly cleaning and drying, you can effectively eliminate mold and prevent its return. Regular monitoring will keep your environment safe long-term, ensuring peace of mind as you move forward from the disaster.
Recent Posts
Essential Steps for Mold Remediation After Flooding
After flooding, addressing mold remediation is vital to prevent health risks and further damage. You’ll
Top Mold Remediation Strategies Post-Flooding
Is it true that effective mold remediation can greatly reduce health risks after flooding? Understanding
5 Best Homeowner Tips for Flood Prevention
Imagine your home as a boat adrift in a storm, with every rainstorm posing a