
Contents
Before you start removing floodwater, you need to Extract Floodwater safely by first assessing the site for electrical risks, structural damage, and contamination. Then you can choose the right extraction method, from a wet/dry vacuum for shallow water to a submersible pump for deeper flooding. Once the water is out, drying and mold control need to begin at once, because hidden moisture can keep damage spreading long after the surface looks clear.
Key Takeaways
- Shut off electricity, gas, and water if safe, and document flood damage with dated photos for insurance claims.
- Treat flooded areas as contaminated; wear boots, gloves, eye protection, and an N95 mask before entering.
- Remove standing water quickly using a wet/dry vacuum, submersible pump, mop, or squeegee.
- Dry walls, floors, baseboards, and crawl spaces immediately with ventilation and airflow, then verify dryness with a moisture meter.
- Inspect hidden damp areas for mold, remove growth safely, and reduce humidity, leaks, and poor airflow to prevent recurrence.
What to Do First After Floodwater Damage
Before you enter a flood-damaged area, shut off electricity, gas, and water only if it’s safe to do so, then wear protective gear, including rubber boots, gloves, and an N95 respirator.
You should document the scene with dated photos and notes before moving anything. Contact emergency contacts, including your utility provider, landlord, or local disaster office, so they can guide access and hazards.
Notify your insurer promptly and start insurance claims with clear loss records. Remove only essential items that won’t contaminate other spaces, and isolate damaged belongings from clean ones.
Open windows if conditions allow, and set up fans or dehumidifiers only after power is confirmed safe.
Stay connected with neighbors and responders; coordinated action helps your household recover faster and more confidently.
Assess Floodwater Safety Before Cleanup
Even if the water has started to recede, treat every flooded area as contaminated until you verify the source and extent of exposure. You should identify whether the flood came from rain, sewer backup, or runoff, then assume floodwater contaminants may include bacteria, fuel, and chemicals.
Before you enter, shut off electricity if you can do so safely, and wear gloves, boots, eye protection, and a fitted mask as essential safety precautions. Check for sharp debris, unstable flooring, and submerged outlets.
If you smell gas, see visible sewage, or suspect structural damage, stay out and call the proper utility or emergency service. Keep children and pets away, and mark the perimeter so your team can work together with clear, shared boundaries.
Remove Floodwater Fast With the Right Tools
Start removing standing water as soon as the area is safe to enter, because delay increases damage and mold growth.
You’ll move faster when you match water extraction methods to the depth and area of the flood. Use a wet/dry vacuum for shallow pooling, a submersible pump for deeper water, and a mop or squeegee to pull residue into reachable spots.
Keep essential cleanup tools close: extension cords rated for wet areas, buckets, a broom, gloves, and absorbent towels.
Work from the lowest point toward the exit so you don’t trap water behind you. Empty equipment often, clean intake screens, and inspect hoses for clogs.
If you’re working with a team, assign zones so everyone stays coordinated and efficient.
Dry Walls, Floors, and Crawl Spaces
Once the standing water is gone, dry walls, floors, and crawl spaces immediately to stop moisture from spreading into framing, insulation, and subflooring. You’ll protect the structure by moving air and heat through every affected zone. Set up fans, dehumidifiers, and open access points so your team can work efficiently.
- Remove soaked baseboards and trim.
- Lift carpet and padding for drying.
- Ventilate crawl spaces with directed airflow.
- Check drainage systems and clear blockages.
Keep moisture barriers intact where possible, and replace damaged sections only after surfaces read dry.
In crawl spaces, elevate air circulation beneath joists and along perimeter walls. Use meters to verify dryness before reinstalling finishes.
When you work this methodically, you keep the space stable and you help everyone on site stay confident, organized, and aligned.
Check for Mold After Flooding
Check hidden damp areas behind walls, under flooring, and inside crawl spaces, since moisture can remain after surface drying.
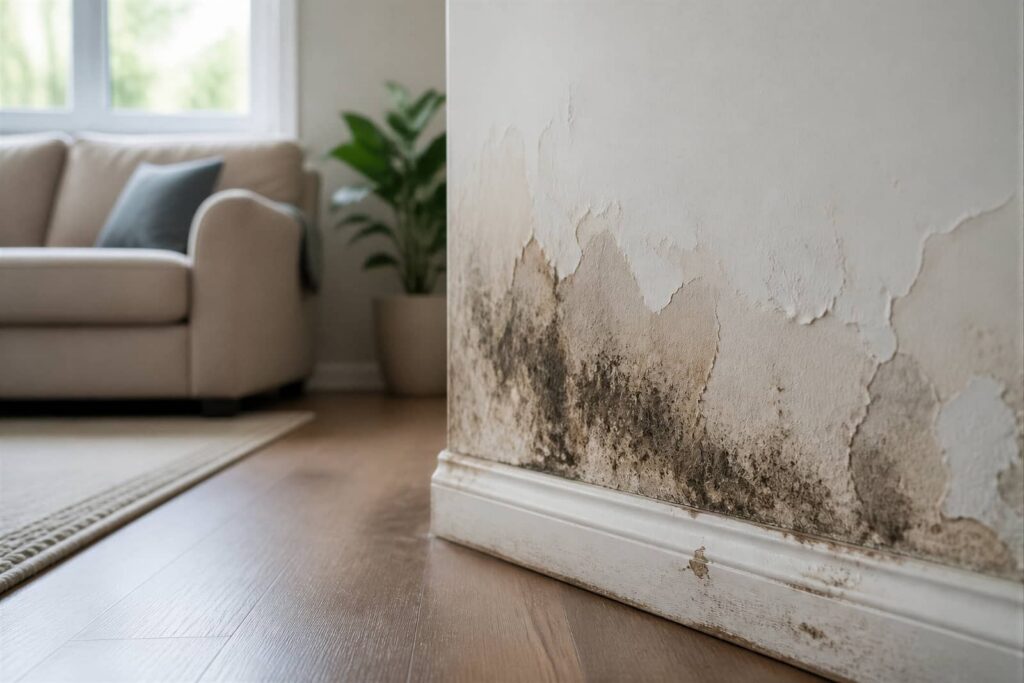
Look for visible mold growth on materials and structural surfaces, including discoloration, spotting, and fuzzy colonies.
Smell for musty odors, because they often indicate hidden microbial growth you need to address.
Inspect Hidden Damp Areas
Even if visible surfaces look dry, you should inspect hidden damp areas after flooding because mold often grows behind walls, under flooring, inside cabinets, and around insulation.
Use a moisture meter and your nose to locate hidden leaks and lingering moisture sources, then document every suspect area. Open access panels, remove toe kicks, and check wall cavities where water may have pooled.
- Probe baseboards for soft spots.
- Lift corner flooring and underlayment.
- Inspect cabinets, closets, and utility chases.
- Verify insulation, sill plates, and subfloors.
If readings stay elevated, dry the assembly with airflow and dehumidification before you close anything up.
Spot Visible Mold Growth
Look closely for visible mold growth on wet materials, especially along drywall seams, trim, insulation, carpet backing, and the undersides of cabinets.
Use bright lighting and a flashlight at a shallow angle to reveal patches, spotting, and discoloration. Scan for fuzzy, slimy, or powdery colonies, and compare them with adjacent clean surfaces.
With basic mold identification techniques, you can document visible mold signs by noting color, coverage, and spread across materials. Mark affected zones with tape, and photograph each area before you disturb anything.
If you belong to a team, assign one person to record observations while another inspects edges and fasteners. Confirm that you’re seeing growth, not dirt or stains, before you plan removal.
Keep the area isolated until you finish your assessment.
Smell For Musty Odors
After flooding, smell the affected area for a persistent musty, earthy odor, since that often signals hidden mold in walls, under flooring, or inside cavities you can’t see. Move slowly through each room and compare odors near baseboards, vents, and damp insulation. If the smell strengthens, treat that zone as contaminated.
- Note where the odor peaks.
- Check after ventilation changes.
- Isolate saturated materials.
- Document findings for cleanup.
You’ll improve mold prevention by drying the space fast and removing porous items that keep odors trapped. For odor elimination, use dehumidification, HEPA filtration, and targeted cleaning on nonporous surfaces.
If the smell lingers after drying, you likely need deeper inspection or professional remediation. Stay methodical; your crew’s careful checks protect everyone’s health and keep the home recovery on track.
Remove Mold Safely and Prevent Regrowth
Once the area is dry, remove mold promptly with proper protective gear, including gloves, eye protection, and an N95 respirator.
You can handle small, nonporous surfaces with detergent and water, then rinse and dry completely. For porous materials, discard items that stayed wet for more than 48 hours.
Identify mold types before cleaning; some require professional remediation. Keep containment tight by sealing doors, running exhaust fans, and blocking air pathways so spores don’t spread to your crew’s space.
After removal, apply prevention strategies: lower indoor humidity below 60%, fix leaks, and improve airflow with fans and dehumidifiers.
Clean affected tools and discard contaminated cloths. Reinspect daily for staining, odor, or recurrence, and repeat drying until materials stay stable and dry.
Frequently Asked Questions
How Long Does Floodwater Cleanup Usually Take?
Floodwater cleanup usually takes hours to days; your cleanup timeline depends on damage, drying, and mold risk. You’ll complete water removal quickly, then inspect, disinfect, and dry affected areas to keep your space safe.
Can I Save Furniture Soaked in Floodwater?
Yes, you can save some furniture, if you act fast: remove water, clean surfaces, dry thoroughly. You’ll need furniture restoration, mold treatment, and careful inspection; upholstered pieces usually won’t survive, but solid wood often can.
What Insurance Documents Should I Photograph First?
Photograph your policy declarations page, driver’s license, property inventory, and damaged items first for your insurance claim. Then organize every image by room and date; strong document organization helps you belong with prepared, trusted claimants.
When Should I Hire a Professional Restoration Company?
Hire a professional restoration company when water damage reaches walls, insulation, or electrical systems; many homes needed restoration services beyond DIY. You’ll protect your space and join neighbors who act fast.
How Do I Prevent Future Flooding in My Home?
You can prevent future flooding by improving drainage solutions, correcting landscape grading, sealing foundation cracks, installing sump pumps, and maintaining gutters. You’ll protect your home better when you inspect these systems regularly and act fast.
Final Thoughts
After floodwater hits, move fast: shut off hazards, assess safety, and pump or vacuum standing water before it spreads. Then dry walls, floors, and crawl spaces with fans and ventilation, stripping out soaked materials that won’t recover. Inspect hidden spaces for mold, watching for stains and musty odors. If you find growth, suit up, remove it promptly, and keep humidity low. Act like a technician, and you’ll stop damage before it takes root.
Recent Posts
Structural Drying for Flooded Property Restoration
When water invades a structure, both speed and strategy matter. Flooded property restoration starts by
What Is Structural Drying After Flooding
The majority of flood damage problems can worsen when moisture remains trapped in building materials,
5 Tips for Structural Drying After Flooding
After a flood, you need to act fast, or moisture can continue spreading behind walls