Contents
In the aftermath of water damage, the environment can feel like a sponge, saturated and ready to deteriorate further. To combat this, you need to employ systematic structural drying methods that address moisture effectively. From high-velocity air movement to advanced dehumidification techniques, each approach plays a critical role. Understanding these methods can greatly influence the restoration process, but there’s more to evaluate before you can ascertain complete recovery.
Key Takeaways
- Employ high-velocity fans to create airflow across wet surfaces for efficient evaporation and drying.
- Utilize dehumidifiers tailored to the environment, such as refrigerant for warmer areas and desiccant for cooler conditions.
- Implement structural drying equipment, including drying mats and industrial-grade vacuums, to remove moisture effectively.
- Conduct moisture assessments with moisture meters and thermal imaging to identify hidden moisture pockets.
- Perform controlled demolition when necessary to expedite drying and prevent mold growth in severely affected areas.
Air Movement Techniques
When dealing with water damage, effective air movement techniques are crucial for expediting the drying process. Proper airflow management is essential to ensure that moisture evaporates efficiently.
Start by evaluating the affected area and identifying the source of water. Next, strategically position fans to maximize airflow. Place high-velocity fans in a way that creates a cross-current, directing air toward wet surfaces while avoiding obstructions. This targeted fan placement enhances moisture removal and accelerates drying times.
Consider using a combination of floor and ceiling fans to improve air circulation at multiple levels. Adjust the angle of the fans to optimize their impact, making sure they cover as much surface area as possible.
Monitor the drying progress regularly, making adjustments to fan placement as needed. By implementing these air movement techniques, you’ll create an environment that promotes swift and effective drying, ultimately minimizing damage and facilitating a return to normalcy.
Dehumidification Methods
After establishing effective air movement techniques, the next step involves implementing dehumidification methods to further reduce moisture levels in the affected area.
You have two primary options: desiccant dehumidifiers and refrigerant dehumidifiers.
Desiccant dehumidifiers work by using materials that absorb moisture from the air, making them ideal for low-temperature environments. They’re particularly effective in spaces like basements or areas with persistent humidity.
On the other hand, refrigerant dehumidifiers function by cooling the air, causing moisture to condense on coils, which is then collected and drained away. These are best suited for warmer environments.
Thermal Imaging Inspection
Thermal imaging inspection plays an essential role in identifying hidden moisture within structures after water damage.
By detecting temperature variations, you can pinpoint areas that require further attention, ensuring effective drying and preventing mold growth.
This process involves utilizing specialized cameras to create thermal images, allowing for a thorough evaluation of the affected environment.
Purpose of Thermal Imaging
In water damage restoration, utilizing thermal imaging can greatly enhance the inspection process. This technology allows you to identify hidden moisture that traditional methods might miss.
By using thermal imaging applications, you can quickly assess the extent of water intrusion, ensuring you address all affected areas effectively. The thermal imaging benefits include reduced inspection time and increased accuracy, enabling you to pinpoint problem areas without invasive procedures.
You’ll find that it helps in detecting temperature variations, which indicate moisture presence, guiding your drying efforts more efficiently.
Benefits of Detection
Utilizing thermal imaging inspection provides a range of benefits that enhance the overall water damage restoration process. One of the primary detection methods, it allows you to identify hidden moisture that traditional techniques might miss.
This precision in detection means you can target affected areas more effectively, minimizing the risk of mold growth and structural damage. Additionally, thermal imaging provides immediate visual feedback, enabling you to make informed decisions quickly.
The detection benefits also extend to cost savings; by addressing issues promptly, you can avoid extensive repairs down the line. Ultimately, integrating thermal imaging into your restoration efforts improves efficiency and fosters a sense of community among professionals committed to delivering high-quality results.
Process Overview
When evaluating water damage, employing thermal imaging inspection is an essential step that enhances the restoration process. This technology allows you to identify hidden moisture pockets behind walls and under floors, ensuring effective water extraction.
By detecting temperature variations, thermal imaging reveals areas that may not be visible to the naked eye, streamlining your assessment. Initiating this process early in the restoration timeline can greatly reduce the duration and cost of repairs.
Once moisture sources are identified, you can prioritize drying efforts, which ultimately leads to a more efficient restoration. By integrating thermal imaging into your strategy, you protect your property and foster a sense of belonging within your community, ensuring everyone is safe and secure.
Moisture Content Measurement
Measuring moisture content is essential for effective water damage restoration, as it helps determine the extent of the problem and guides your drying strategy.
You’ll rely on specialized tools, such as moisture meters and hygrometers, to obtain accurate assessments of affected materials.
Interpreting these moisture readings enables you to make informed decisions about when to proceed with drying methods and when additional intervention is necessary.
Importance of Moisture Measurement
How can you ensure effective structural drying after water damage? The key lies in precise moisture measurement.
Understanding moisture impact is essential; it can lead to mold growth and structural compromise if not addressed. By employing accurate measurement techniques—such as pin-type and pinless moisture meters—you can assess the extent of water intrusion and determine drying progress.
Regular monitoring allows you to identify hidden pockets of moisture that could hinder the drying process. This data empowers you to make informed decisions on drying methods, ensuring that you achieve the best outcomes.
Tools for Accurate Assessment
Accurate assessment of moisture content is vital to effective structural drying following water damage. To achieve this, you’ll need reliable moisture detection tools that provide precise readings.
Moisture meters, including pin and pinless types, are essential diagnostic tools. Pin meters penetrate materials to measure moisture directly, while pinless meters use electromagnetic signals to assess moisture levels without causing damage.
Infrared cameras can also help you identify hidden moisture behind walls or ceilings, enabling an extensive analysis of affected areas.
Additionally, hygrometers measure relative humidity, offering insights into air moisture levels that impact drying efficiency.
Interpreting Moisture Readings
While you gather moisture readings, interpreting those results is essential for effective drying strategies. Start by identifying moisture sources, as this will guide your reading interpretation.
High moisture levels in specific areas suggest active leaks or lingering water, while lower readings may indicate areas that are drying effectively. Pay close attention to the moisture content percentage; readings above 20% often signal the need for immediate action.
Utilize your moisture meter’s features—like comparative analysis—to assess variations in different materials. This approach helps pinpoint problem areas and fosters a sense of community among professionals who share insights and techniques.
Accurate reading interpretation will ultimately enhance your drying efforts and ensure successful restoration.
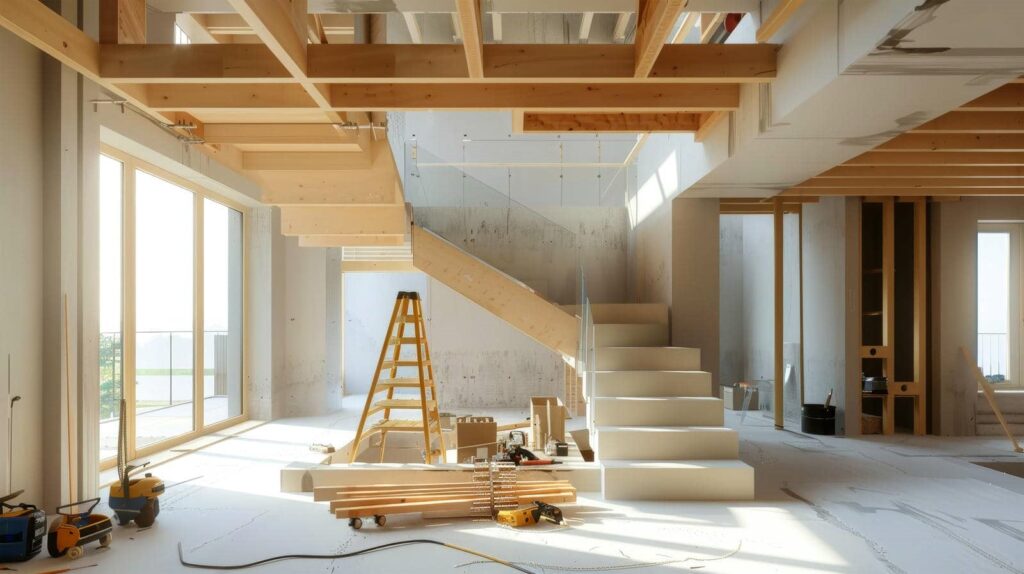
Structural Drying Equipment
When addressing water damage, utilizing the right structural drying equipment is essential for effective moisture removal and preventing further deterioration.
Structural fans play a critical role in this process, as they circulate air to expedite evaporation. By placing these fans strategically, you can ensure that damp areas receive maximum airflow, promoting efficient drying.
In addition to fans, drying mats are invaluable for addressing moisture trapped in flooring and subflooring. These mats work by drawing moisture upwards, allowing for consistent drying across various surfaces.
When you combine structural fans with drying mats, you create a thorough drying strategy that targets both surface and hidden moisture effectively.
Investing in high-quality equipment accelerates the drying process while minimizing the risk of mold growth and structural damage.
Flood Extraction Procedures
When addressing flood extraction, you’ll need to employ specific equipment effectively to maximize efficiency.
It’s essential to follow safety precautions to protect yourself and others during the extraction process.
Equipment Utilization Techniques
Effective flood extraction procedures rely heavily on specialized equipment designed to remove excess water quickly and efficiently. To achieve ideal results, you’ll want to utilize high-capacity pumps and industrial-grade vacuums.
Prioritize equipment maintenance practices to ensure your tools perform at their best; regular checks can prevent failures during critical situations.
Additionally, integrating advanced drying technologies, such as desiccant dehumidifiers and air movers, greatly enhances drying speed and effectiveness. Familiarize yourself with the specific capabilities of each piece of equipment to make informed decisions during the extraction process.
Safety Precautions Overview
Flood extraction procedures demand strict adherence to safety precautions to protect both personnel and property. Before starting, verify you’re equipped with appropriate safety gear, including gloves, boots, and masks to prevent exposure to contaminants.
Familiarize yourself with emergency procedures, such as evacuation routes and first-aid stations, in case of unforeseen incidents. Always assess the structural integrity of the affected area; unstable structures can pose significant risks. Additionally, check for electrical hazards before using any equipment.
Use caution when handling water-damaged materials, as they may harbor mold or harmful chemicals. By prioritizing these safety measures, you safeguard yourself and foster a responsible environment for your team, reinforcing the importance of collective safety in flood extraction efforts.
Controlled Demolition
Although water damage can severely compromise structural integrity, controlled demolition offers a targeted approach to mitigate further risks.
By employing specific controlled demolition techniques, you can safely remove compromised materials without affecting surrounding structures. This process begins with a thorough structural integrity assessment, identifying areas at risk of collapse or continued damage.
Once you’ve pinpointed the compromised sections, you can carefully dismantle them using precision tools and methods, ensuring minimal disruption to unaffected areas.
This approach accelerates the drying process and prevents mold growth and further structural degradation.
Ventilation Strategies
After addressing compromised materials through controlled demolition, implementing effective ventilation strategies is vital for thorough drying.
You can choose between natural ventilation and mechanical ventilation, each having distinct advantages. Natural ventilation relies on open windows and doors, facilitating airflow that can help remove moisture. However, this method is dependent upon external weather conditions, which can be unpredictable.
On the other hand, mechanical ventilation utilizes fans and dehumidifiers to actively circulate air and maintain ideal humidity levels. This method ensures consistent airflow, regardless of outside conditions, which is essential in tightly sealed spaces.
Combining both strategies can enhance drying efficiency. You’ll want to manage airflow direction and volume to ensure every affected area receives adequate exposure to dry air.
Chemical Treatments for Mold Prevention
To effectively prevent mold growth after water damage, you’ll want to contemplate applying chemical treatments that specifically target mold spores and inhibit future development.
One of the most practical options is using chemical sprays designed with potent mold inhibitors. These products work by penetrating porous materials and creating an environment where mold can’t thrive.
Before applying, verify the affected area is thoroughly dried and cleaned to maximize the effectiveness of the treatment.
When you spray the solution, focus on high-risk areas such as corners, under sinks, and around windows.
Always follow the manufacturer’s instructions for proper application and safety precautions.
Regularly inspect the treated areas to confirm the mold inhibitors are performing as intended.
Post-Drying Assessment and Monitoring
Once you’ve completed the structural drying process, conducting a thorough post-drying assessment is essential to confirm that no moisture remains within the materials or the environment.
Start with a detailed post-drying inspection, focusing on areas that experienced significant water exposure. Use moisture meters to perform a precise moisture evaluation on walls, floors, and ceilings. This step confirms that you identify hidden pockets of moisture that could lead to mold growth or structural damage.
Next, monitor the drying environment, checking humidity levels and air circulation. Document your findings meticulously, noting any areas that may require additional drying or treatment.
If you detect lingering moisture, consider reapplying drying techniques or utilizing specialized equipment. By maintaining a vigilant approach in this phase, you protect the integrity of your property and promote a safe, healthy living space for everyone involved.
Frequently Asked Questions
How Long Does the Structural Drying Process Typically Take?
The structural drying process typically takes 3 to 7 days, depending on various drying factors like humidity, temperature, and material types. Understanding the drying timeline helps you manage expectations during restoration effectively.
Can I Stay in My Home During the Drying Process?
You can stay, but it’s risky. Picture a ship in a storm; safety precautions are essential. Health concerns may arise from mold or fumes, so ensure proper ventilation and consult professionals before making a decision.
What Are the Signs of Improper Drying?
You’ll notice signs of improper drying through persistent moisture detection, musty odors, discoloration, or mold growth. If drying equipment isn’t effectively removing moisture, it’s essential to address these issues promptly to prevent further damage.
Will My Insurance Cover the Cost of Water Damage Restoration?
Your insurance policies often cover water damage restoration, but coverage limits vary. Review your specific policy details to understand what’s included, and consult your agent for clarification on any exclusions or additional coverage options available.
How Can I Prevent Future Water Damage?
Preventing future water damage is like building a fortress. Implement waterproofing techniques and conduct routine maintenance on roofs, gutters, and plumbing. These steps will safeguard your home, ensuring a dry and secure environment for you and yours.
Final Thoughts
In the aftermath of water damage, implementing these top structural drying methods can transform a damp, chaotic space into a dry, safe haven. Picture air swirling through rooms with high-velocity fans, while dehumidifiers quietly extract moisture like sponges. As you monitor moisture levels and conduct thermal imaging inspections, you’re not just restoring a structure—you’re reclaiming a home. With thorough post-drying assessments, you ensure every corner is dry, mold-free, and ready to welcome warmth and comfort once again.
Recent Posts
Top 5 Commercial Mold Inspection Best Practices
When it comes to commercial mold inspection, you can’t overlook the significance of best practices.
Why Prioritize Best Practices in Mold Inspection?
You might find it coincidental that mold can thrive in the very spaces you consider
What Are Best Practices for Commercial Mold Inspection?
When it comes to commercial mold inspection, understanding the implications of mold growth is vital