Contents
After flooding, addressing mold remediation is vital to prevent health risks and further damage. You’ll need to start by evaluating the extent of water damage and ensuring safety precautions are in place. Identifying affected areas and using a moisture meter will help you detect hidden dampness. From there, the process involves several essential steps that must be executed methodically to ensure effective mold prevention and remediation. Understanding these steps can make all the difference in safeguarding your environment.
Key Takeaways
- Assess the extent of water damage through visual inspection, moisture meters, and thorough documentation of affected areas.
- Ensure safety by conducting air quality assessments and using personal protective equipment (PPE) during remediation.
- Remove standing water using pumps or wet vacuums and improve moisture control with fans and dehumidifiers.
- Clean and disinfect all affected surfaces with suitable detergents and EPA-approved disinfectants, ensuring thorough drying.
- Regularly inspect for mold growth, looking for discoloration, musty odors, and using moisture meters for hidden mold detection.
Assessing the Extent of Water Damage
When evaluating the extent of water damage, you should start by identifying the areas affected by flooding. Your water damage assessment begins with a thorough visual inspection. Look for discoloration, warping, or stains on walls, ceilings, and floors.
Next, perform a moisture level evaluation using a moisture meter to detect hidden dampness in materials. Pay close attention to porous surfaces like drywall and wood, as they can retain moisture and promote mold growth.
Document your findings meticulously, noting the severity and location of the damage. This information will guide your remediation efforts and help you understand the scope of work needed.
If you find excessive moisture, it’s essential to act quickly to prevent further damage. Remember, accurate assessment helps with effective remediation and fosters a sense of control during a stressful situation, allowing you to take the necessary steps toward recovery.
Ensuring Safety and Health Precautions
Before you begin mold remediation, it’s essential to prioritize safety and health precautions. Start by conducting an air quality assessment to identify any potential contaminants. This step helps you understand the risks you’re facing and allows you to take informed action.
Next, make certain you have the right personal protective equipment (PPE) on hand. Wear masks, gloves, and goggles to protect yourself from mold spores and other hazardous materials. Consider using a respirator if the area is heavily infested.
Seal off the work area to prevent mold spores from spreading to other parts of your home.
Ventilate the space properly to maintain good air quality while you work.
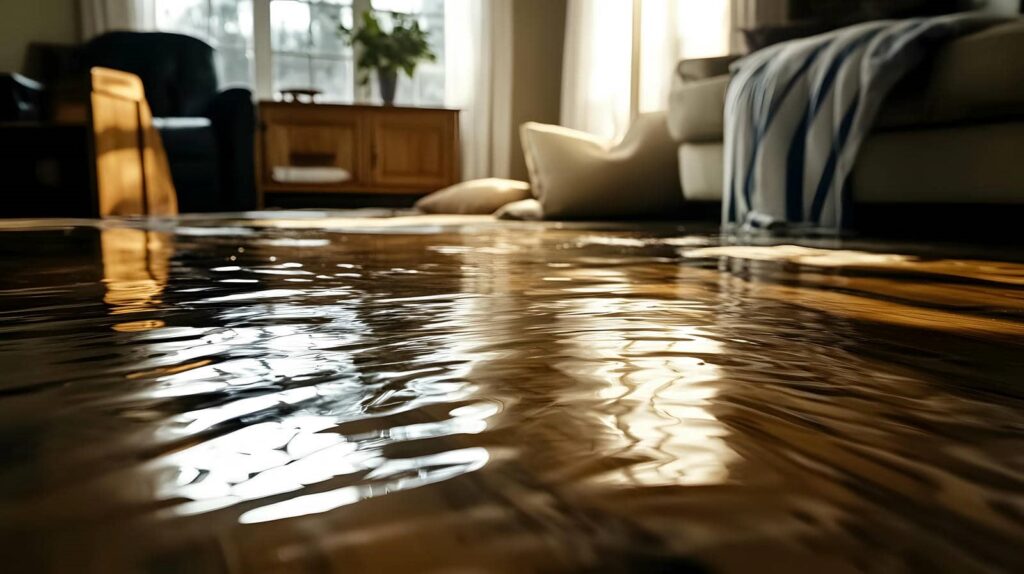
Removing Standing Water and Moisture
After ensuring your safety with appropriate protective gear and sealing off the work area, the next step is to remove standing water and moisture, which is vital to preventing mold growth.
Start with water extraction using pumps or wet vacuums to eliminate any remaining standing water. Focus on areas like basements, crawl spaces, and any other affected rooms.
Once the bulk of the water is gone, employ fans and dehumidifiers to improve moisture control. This helps reduce humidity levels and accelerates drying.
Monitor moisture levels with a hygrometer to confirm your efforts are effective. Remember, even small amounts of moisture can foster mold development, so be thorough.
After completing this process, you’ll create a safer environment for yourself and others, greatly reducing the risk of mold proliferation.
Take pride in your proactive approach to mold remediation; it’s a vital step toward restoring your space.
Cleaning and Disinfecting Affected Areas
Once you’ve removed standing water and moisture, it’s vital to clean and disinfect the affected areas to eliminate any remaining contaminants.
Proper cleaning techniques and effective disinfecting agents are essential in preventing mold growth and ensuring a safe environment.
Here are three key steps to follow:
Use Appropriate Cleaning Techniques: Start by scrubbing surfaces with a mixture of water and a mild detergent to remove dirt and debris. Focus on areas prone to mold.
Apply Disinfecting Agents: After cleaning, use EPA-approved disinfectants to kill any lingering pathogens. Confirm the product is suitable for the surfaces you’re treating.
Allow Surfaces to Dry Completely: Make sure that all cleaned areas are fully dried to prevent mold from returning.
Drying Out the Environment
Thorough cleaning and disinfecting lay the groundwork for effective mold remediation, but addressing moisture levels is equally critical.
To prevent mold growth, you need to dry out the environment swiftly. Start by using dehumidifiers to reduce humidity levels. Place them in affected areas and monitor their operation until moisture levels stabilize below 60%.
In addition, employ effective ventilation techniques. Open windows and doors to promote air circulation, and use fans to direct airflow. This combination helps evaporate residual moisture more rapidly.
When possible, run air conditioning units, which also assist in lowering humidity.
Don’t forget to check hidden spaces, such as attics or crawl spaces, as moisture can linger there unseen.
Inspecting for Mold Growth
After flooding, you need to inspect for mold growth promptly.
Look for visual signs like discoloration or a musty odor, as these can indicate the presence of mold.
Additionally, use hidden mold detection techniques, such as moisture meters or thermal imaging, to identify areas that may not be immediately visible.
Visual Signs of Mold
When evaluating your home for mold growth, it’s essential to recognize the visual signs that indicate its presence.
Mold can appear in various colors, often making it easier to spot. Keep an eye out for these key indicators:
Discoloration: Look for patches of green, black, white, or yellow on walls, ceilings, and floors.
Texture Changes: Notice any fuzzy, slimy, or powdery surfaces, which are common characteristics of mold.
Water Stains: Check for dark or damp areas, especially after flooding, as these can harbor mold growth.
Additionally, if you detect musty odors, it often signals hidden mold.
Hidden Mold Detection Techniques
While visual signs of mold can provide a clear indication of its presence, hidden mold often lurks in areas that are out of sight, making detection more challenging.
To effectively uncover these concealed threats, you should employ various mold inspection methods. One of the most advanced techniques is using infrared technology, which detects temperature differences in building materials, indicating potential mold growth behind walls or ceilings.
Moisture meters are also invaluable, helping you identify damp areas that could foster mold without visible signs.
Regularly inspecting HVAC systems and checking under sinks or appliances will further enhance your detection efforts.
Implementing Preventative Measures
Implementing preventative measures is essential for safeguarding your property against mold growth following flooding. By taking proactive steps, you can greatly reduce the risk of mold infestation.
Here are three key measures you should consider:
Use Mold-Resistant Materials: When rebuilding or renovating, opt for mold-resistant drywall, paints, and insulation to create a more resilient environment.
Maintain Humidity Control: Keep indoor humidity levels below 60% by using dehumidifiers and ensuring proper ventilation. Regularly check for moisture accumulation in vulnerable areas.
Regular Inspections: Conduct routine inspections of your property, especially after heavy rains, to catch any signs of water intrusion early.
Frequently Asked Questions
How Long Does Mold Remediation Typically Take After Flooding?
Mold remediation typically takes one to two weeks, depending on the severity of the infestation and the remediation process. Understanding the mold growth timeline helps you address the issue efficiently, ensuring a safe environment.
Can I Tackle Mold Remediation Myself or Hire Professionals?
When it comes to mold remediation, you might think you can go it alone, but it’s often wiser to hire professional services. DIY techniques can work, but experts ensure thoroughness and safety like no other.
What Are the Costs Associated With Mold Remediation Services?
Mold remediation costs vary based on mold testing, the extent of damage, and the chosen prevention strategies. You’re looking at hundreds to thousands of dollars, depending on the severity and required professionals’ expertise, to ensure a safe environment.
Will My Insurance Cover Mold Remediation Expenses?
Your insurance policies may cover mold remediation, but it depends on specific coverage limits. Review your policy details and consult your insurer to confirm what’s included, ensuring you’re fully informed about potential expenses.
How Can I Tell if Mold Is Hidden Behind Walls?
Like a secret lurking in the shadows, hidden mold behind walls can be elusive. Conduct a wall inspection, looking for discoloration, musty smells, or moisture. Use a moisture meter for more precise detection. Stay vigilant!
Review
Tackling mold remediation after flooding is essential to safeguarding your home and health. By evaluating damage, ensuring safety, and thoroughly cleaning and drying affected areas, you can nip potential mold problems in the bud. Remember, an ounce of prevention is worth a pound of cure. Regular inspections and preventive measures will keep your environment mold-free. Stay vigilant, and you’ll keep mold at bay—making your home a safe haven once again.
Recent Posts
How Much Does Mold Inspection Cost After Water Damage?
Like a hidden predator, mold can silently wreak havoc on your home after water damage.
Why Are Mold Inspection Costs So High?
Imagine a ship steering through fog; without a skilled captain and precise instruments, it risks
Understanding Mold Inspection Costs After Water Damage
Mold can start growing within 24 to 48 hours after water damage, making prompt inspection