
Contents
When water damage hits, you don’t have much time before mold can begin growing in damp walls, flooring, and hidden cavities. Water Damage Mold Cleanup starts with stopping the source, drying the affected area, and assessing what can be saved before contamination worsens. The difference between a clean recovery and a bigger repair often comes down to a few precise steps, and the next ones may change how you handle the entire cleanup.
Key Takeaways
- Stop the water source immediately to prevent further damage and mold growth.
- Remove standing water and dry the area quickly with fans and dehumidifiers.
- Isolate the affected area with plastic sheeting and turn off HVAC systems.
- Inspect for hidden mold using moisture meters, odor checks, and wall inspections.
- Remove unsalvageable porous materials safely and call professionals for large or persistent mold.
Stop the Water Source Fast
Before you clean up mold, you need to stop the water at its source as quickly as possible. Turn off the main supply if a pipe, fixture, or appliance is leaking.
If the leak comes from a roof, window, or exterior wall, limit exposure and call for repair support right away. You’ll protect your space and help your household stay ahead of damage with quick action.
If you can safely do so, shut off local valves, disconnect hoses, and unplug affected equipment. Check the water source for active flow, then confirm the leak has stopped before you move on.
When you act fast, you reduce the chance that mold gets a foothold and keep your cleanup team working with a safer, drier starting point.
Dry the Area Before Mold Spreads
Remove standing water immediately with pumps, wet vacuums, or absorbent towels so moisture doesn’t remain on floors or in hidden spaces.
Then increase air circulation with fans and dehumidifiers to lower humidity and speed evaporation.
You should keep the area dry until all materials return to normal moisture levels, because mold can spread quickly in damp conditions.
Remove Standing Water
Get standing water out as quickly as possible to slow mold growth and limit damage. You should start standing water removal immediately with pumps, wet vacs, or absorbent tools sized for the job.
Use water extraction techniques that match the surface: pull water from carpets, lift it from seams, and remove puddles from subfloors and corners.
Check hidden pockets under cabinets, baseboards, and appliances, because trapped water can keep feeding mold.
Empty the space methodically, and verify each area feels dry before you move on. If you’re part of a cleanup team, coordinate your passes so no section gets missed.
Fast, disciplined removal protects materials, reduces odor, and helps your whole crew regain control of the room.
Increase Air Circulation
Once the standing water is gone, you need to move air through the space fast to drive down moisture and slow mold growth. Open windows and interior doors, then set fans to create crossflow. Use dehumidifiers with ventilation techniques that pull damp air out and replace it with drier air. Position air purifiers with HEPA filters near affected zones to catch airborne spores while you work.
- Keep fans running 24/7 until surfaces feel dry.
- Lift rugs, furniture pads, and wet materials for airflow.
- Check hidden cavities, closets, and baseboards for trapped moisture.
- Replace saturated insulation or drywall before mold can anchor.
You’re not just drying a room; you’re protecting your space and helping everyone in it stay safe.
Assess Mold Damage After Water Damage
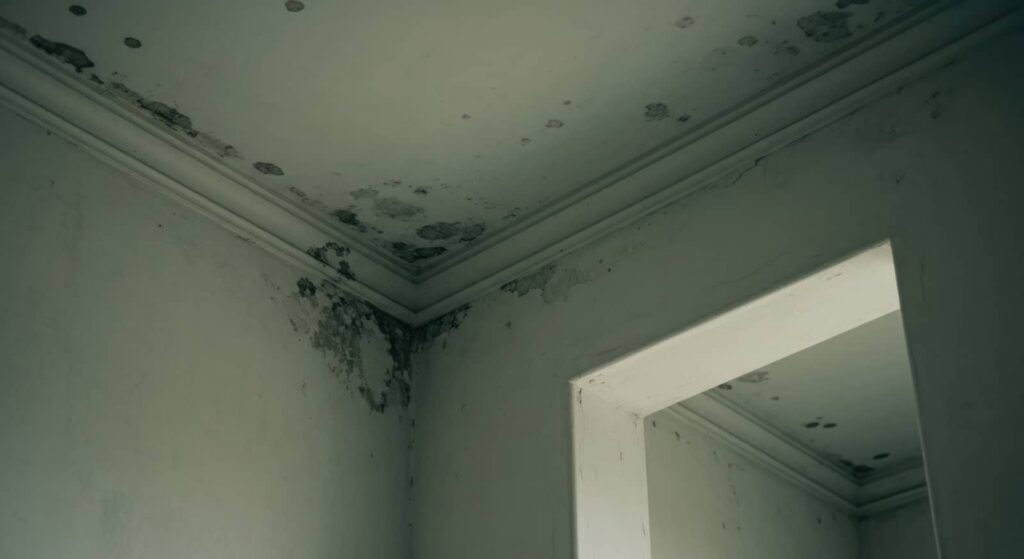
You should check for visible mold growth on walls, ceilings, floors, and contents as soon as the area is dry enough to inspect.
Then inspect hidden areas like behind baseboards, inside wall cavities, under flooring, and within HVAC components, since mold often spreads out of sight.
Note any material damage, including warped drywall, softened wood, and stained insulation, so you can judge what needs removal or remediation.
Check Visible Growth
Before you clean or dry anything, inspect the affected area for visible mold growth, discoloration, and surface damage. Use mold identification techniques to note color, texture, and spread, then compare affected and unaffected surfaces. You’re building a clear baseline that helps your team act fast and stay aligned.
- Look for fuzzy, slimy, or powdery patches.
- Mark stained drywall, trim, and flooring edges.
- Photograph each spot for accurate records.
- Note any warped, soft, or peeling materials.
If growth appears active, isolate the area and avoid brushing it dry, which can spread spores. Document what you see, then apply growth prevention strategies once the surface is stabilized.
Careful visual checks help you protect your space, support your crew, and make cleaner decisions.
Inspect Hidden Areas
Water often drives mold into hidden cavities, so inspect behind baseboards, under flooring, inside wall voids, and above ceiling tiles to assess the full extent of damage.
Use a flashlight, moisture meter, and inspection techniques that trace staining, warping, and odor patterns. If you detect hidden mold, open access points carefully and document each finding with photos and notes.
Check around plumbing chases, HVAC returns, and window framing, since these areas trap moisture and support growth. You’re not alone in this process; a methodical sweep helps your team stay coordinated and confident.
Mark suspect zones for follow-up testing or removal, and keep airflow moving while you work. Precise inspection now reduces missed contamination and supports a safer cleanup plan for everyone involved.
Note Material Damage
Document damaged materials systematically to judge how far mold has spread and what can stay in service. You should record each affected item, its location, and the visible damage level during your property assessment.
Photograph drywall, insulation, flooring, trim, and furniture before removal so you can support insurance claims and track changes.
- Mark soft, swollen, stained, or delaminated surfaces.
- Note odors, warping, and hidden moisture at seams.
- Separate salvageable materials from porous, contaminated ones.
- Tag items needing drying, cleaning, or disposal.
Use a simple checklist and measure square footage to keep your team aligned.
When you document consistently, you reduce guesswork, speed decisions, and strengthen your case with insurers and contractors.
Isolate the Cleanup Area
Once you’ve identified the affected room or section, seal it off to keep spores and dust from spreading to clean areas.
Set up protective barriers with plastic sheeting and tape at doorways, vents, and openings so airflow stays controlled. If you’re working with a team, agree on a single entry point and keep it closed when not in use.
Place cleanup equipment inside the zone before you begin so you’re not dragging tools through uncontaminated spaces. Turn off HVAC if it can move air between rooms.
Use wet wipes or a HEPA vacuum at the boundary to capture loose debris. Mark the perimeter clearly, and remind everyone to stay out unless they’re suited up and assigned to the task.
Remove Porous Materials Safely
Pull out soaked porous materials that can’t be fully dried and cleaned, such as carpet padding, drywall, insulation, ceiling tiles, and upholstered items.
You’re protecting your space and your crew when you identify porous material types quickly and remove them before mold spreads deeper.
Wear gloves, an N95 respirator, and eye protection. Double-bag debris, seal each bag, and label it for disposal. Follow local safe disposal methods so you don’t contaminate shared areas or pickup routes.
- Cut materials into manageable sections.
- Keep removed items away from clean rooms.
- Avoid shaking or dragging debris.
- Load bags straight to outside storage.
Clean Hard Surfaces With Mold Remover
Scrub nonporous surfaces with a mold remover that’s labeled for the material you’re treating, then rinse and dry them completely to stop remaining moisture from feeding regrowth.
You’ll get the best mold remover effectiveness when you follow the contact time on the label and use steady pressure with a clean cloth or nylon pad. Focus on hard surface techniques that lift residue without scratching tile, metal, sealed wood, or plastic.
Change your wipe cloth often so you’re not spreading spores back across the surface. Work in small sections, and keep airflow moving so cleaned areas dry fast.
Wear gloves and eye protection, and stay with your cleanup crew’s process so everyone’s steps match. If stains remain after drying, repeat the treatment once before moving on.
Check for Hidden Mold in Walls
Check your walls for stains, swelling, musty odors, or peeling paint, since these often indicate hidden mold behind the surface.
Use a moisture meter or infrared scan to locate damp areas before opening any wall section.
When you inspect, cut only small test openings and wear proper PPE to reduce exposure to spores.
Signs Behind Walls
When mold hides behind walls, you’ll often notice clues on the surface before you ever see the growth itself. You can spot hidden moisture by watching for paint bubbles, soft drywall, or trim that pulls away.
If your wall insulation stays damp, it can feed mold and spread odor through the room. You’re not alone when you catch these early signs; homeowners in water-damage cleanup face the same pattern.
- Stains that grow or darken after drying
- A musty smell near one wall
- Warped baseboards or blistered paint
- Cold, damp spots that don’t match the room
Moisture Detection Methods
To confirm hidden mold in walls, you need to locate the moisture source first, since mold won’t keep growing without it.
Use moisture meters to compare suspect areas with dry sections nearby; elevated readings often point to trapped water. Pair that with detection techniques such as thermal imaging, which can reveal cooler, damp zones behind drywall, and hygrometers to track indoor humidity.
You should also note plumbing runs, exterior leaks, and past flooding, because repeated exposure keeps materials wet. When readings stay high after drying efforts, you’ve likely got an active problem that needs attention.
Safe Wall Inspection
Before you open a wall, shut off power to the affected area at the breaker and verify it’s de-energized with a non-contact voltage tester.
Then inspect from the least invasive point first: remove a baseboard, outlet cover, or small access panel. Use mold inspection techniques like a flashlight, borescope, and odor tracing to find staining, fuzz, or damp insulation.
- Check drywall for swelling, sagging, or discoloration.
- Probe framing for softness, rot, or hidden moisture.
- Map visible growth before disturbing more material.
- Document findings for wall integrity assessment and cleanup planning.
Wear gloves, eye protection, and a respirator, and bag any debris immediately.
If you find widespread mold, stop and bring in a pro so your crew stays safe and the repair path stays clear.
Protect Yourself During Mold Cleanup
Even a small mold cleanup can release spores, so you need to protect yourself with the right gear from the start.
Wear protective gear: an N95 or better respirator, gloves, goggles, long sleeves, and closed shoes. Seal gaps at wrists and ankles so airborne particles don’t get inside. Keep your workspace ventilated, but avoid fans that spread contamination.
Before you begin, build mental preparedness: know the steps, pace yourself, and plan breaks so you stay focused and calm.
Remove gear carefully after the job, then wash exposed skin and launder clothing separately in hot water. Bag disposable items before you carry them through shared spaces.
If you’re consistent, you’ll protect yourself and support your household’s recovery together.
When to Call a Mold Remediation Professional?
If the mold covers a large area, keeps returning, or comes from contaminated water, you should call a mold remediation professional right away. You’re safer when trained technicians assess the structure, identify mold types, and contain spread.
They can test hidden moisture, remove damaged materials, and document the job for your records.
- Visible growth larger than 10 square feet
- Musty odor after cleaning
- Soft, warped, or stained drywall
- Health symptoms during exposure
Professional help also clarifies remediation costs before work starts, so you can plan confidently. You’ll get a clear scope, proper equipment, and a team that knows how to restore your space without guesswork.
That support helps you stay informed and connected through a stressful cleanup.
Prevent Mold After Water Damage
To prevent mold after water damage, dry the area completely within 24 to 48 hours and remove any materials that stay damp.
You should open windows, run fans, and use dehumidifiers to lower indoor moisture fast.
Check hidden spaces like wall cavities, baseboards, and under flooring, because trapped water can support growth.
Clean hard surfaces with detergent and water, then disinfect where needed.
Throw away porous items that can’t dry fully, such as carpet pad, insulation, and ceiling tiles.
As preventive measures, fix leaks, seal cracks, and improve drainage around your home.
When you rebuild, choose mold resistant materials for drywall, insulation, and flooring.
Stay alert, act early, and you’ll protect your space and your community.
Frequently Asked Questions
How Long Does Mold Take to Appear After Water Damage?
Mold can appear within 24 to 48 hours after water damage. You should dry materials quickly, since preventing mold depends on stopping moisture and limiting mold growth before spores establish and spread.
Can I Use Bleach on Moldy Drywall?
No, you shouldn’t use bleach on moldy drywall; bleach effectiveness is poor because moisture stays inside. You’ll usually need to remove and replace it with drywall alternatives, then dry, clean, and monitor the area.
Does Insurance Usually Cover Mold Cleanup Costs?
Usually, you won’t get full mold cleanup coverage; about 1 in 4 claims are denied. You should review your insurance policy details and follow mold prevention tips, because quick action can strengthen your claim.
How Do I Know if Mold Caused Health Symptoms?
You’ll suspect mold symptoms if your cough, wheeze, congestion, eye irritation, or headaches worsen indoors and ease elsewhere. Track health effects, note timing, and seek medical evaluation to confirm mold-related causes.
Can Household Fans Spread Mold Spores During Cleanup?
Yes, household fans can spread mold spores if you use them during cleanup. You should avoid direct fan placement until mold containment is complete, then ventilate cleanly and dry materials with controlled airflow.
Conclusion
Mold can begin growing within 24 to 48 hours after water damage, so your speed matters. If you stop the source, dry the area, and remove unsalvageable porous materials right away, you greatly reduce the chance of hidden growth. Keep the cleanup zone isolated, use proper protection, and inspect walls for trapped moisture. If the damage is extensive or odors persist, call a mold remediation professional before the problem spreads further.
Recent Posts
What Is Water Damage Mold Cleanup?
When your building has a little moisture issue, water damage mold cleanup is the process
Why Mold Remediation Matters After Flooding
Within 24 to 48 hours after flooding, mold can begin to grow, and you may
10 Best Flooded Mold Remediation Tips
Flooded Mold Remediation starts the moment floodwater enters your basement, because moisture can quickly turn