
Contents
When water invades a structure, both speed and strategy matter. Flooded property restoration starts by extracting standing water and mapping moisture, then using air movers and dehumidifiers to dry walls, floors, and framing. Moisture levels are monitored to help limit mold growth and stabilize materials before damaged systems are repaired. If you act too late, hidden damage can spread quickly and turn a manageable loss into a much larger restoration project.
Key Takeaways
- Begin immediate water extraction to limit moisture spread and reduce secondary damage.
- Map moisture using meters and thermal imaging to identify wet materials and hidden cavities.
- Use dehumidifiers and air movers to dry framing, subfloors, drywall, and insulation.
- Remove saturated drywall, insulation, and contaminated materials that cannot dry safely.
- Monitor moisture until materials stabilize, then repair structural systems before reoccupying.
What Is Structural Drying?
Structural drying is the controlled process of removing moisture from a building’s structural materials after water damage. You use it to return framing, subfloors, drywall, and similar components to acceptable moisture levels after a flood event.
This process limits secondary deterioration, such as swelling, microbial growth, and material distortion. You’re not just drying visible surfaces; you’re stabilizing the structure so your property can recover safely and predictably.
Effective structural drying depends on measuring moisture content, controlling temperature, and directing airflow with precision.
If you’ve filed flood insurance, documented water damage, and need a clear path forward, structural drying is a key restoration step. It helps you protect the building, support occupancy decisions, and stay connected to a professional recovery process.
Start Water Extraction and Moisture Mapping
Begin water extraction immediately to remove standing water and reduce how far moisture spreads into building materials. You should choose water removal techniques based on the source, depth, and contamination level, then work in systematic passes to limit rewetting.
Use pumps, weighted extractors, and wet vacuums to pull liquid from surfaces, seams, and cavities you can access safely. As you extract, document conditions with moisture detection methods such as hygrometers, infrared imaging, and penetrating meters.
Map readings room by room, noting wet, damp, and dry zones so your team can stay aligned on priorities. This moisture map guides your next drying decisions and helps you verify progress.
Clear records also help you communicate accurately with occupants, adjust equipment placement, and keep restoration moving efficiently.
Dry Walls, Floors, and Framing
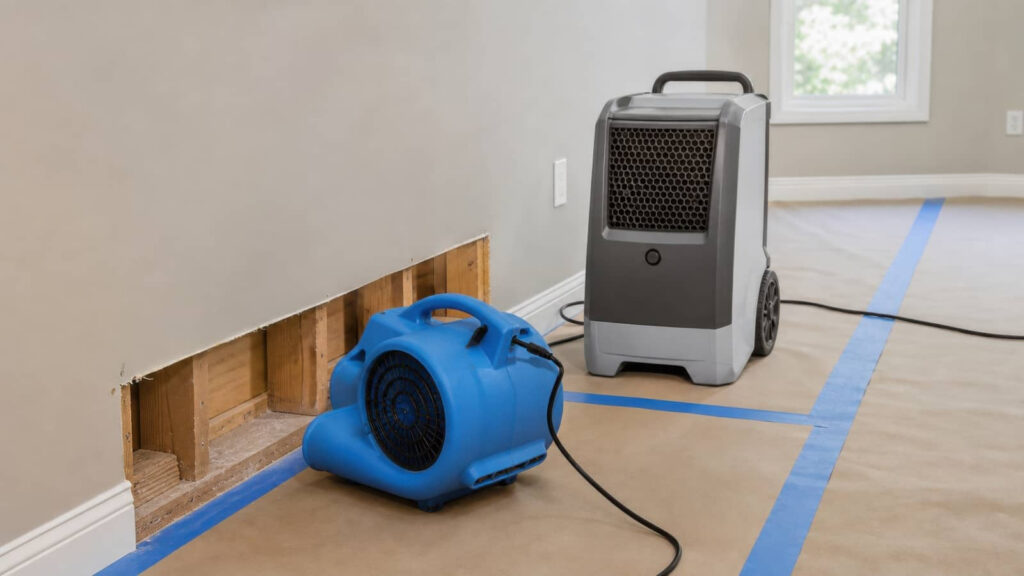
Position drying equipment to target the walls, floors, and framing that still hold moisture after extraction.
You’ll inspect baseboards, cavities, and exposed lumber for dampness, then open affected materials as needed to speed release of trapped water.
Remove wet insulation, cut contaminated drywall above the wet line, and evaluate whether drywall repair is feasible or full replacement makes more sense.
Check subflooring, joists, and wall studs for swelling, delamination, or microbial growth.
Compare flooring options carefully; some finishes can be salvaged, while others need removal to protect the structure.
Keep monitoring each assembly until readings stabilize at acceptable levels.
When you work methodically, you help return the property to a safe, durable condition and support a restoration process that feels organized and reassuring.
Use Air Movers and Dehumidifiers
Set air movers to create strong, even airflow across wet surfaces, and pair them with dehumidifiers to pull moisture out of the air before it can soak back into walls, floors, and framing.
You should match air mover types to the space: low-profile units for tight rooms, axial models for broad coverage, and centrifugal units for focused drying.
Position each machine so air sweeps across surfaces, not straight at obstacles.
Then check dehumidifier efficiency by monitoring temperature, humidity, and condensate output throughout the day.
If readings stall, adjust placement or add capacity.
You’ll dry faster when airflow and moisture removal work together, giving your team a clear path back to a stable, restored structure.
Prevent Mold During Structural Drying
Even during aggressive drying, you need to prevent mold by keeping moisture levels moving down quickly and consistently. You protect materials by using mold prevention techniques that limit the damp conditions spores need.
- Seal the space to reduce outside moisture infiltration.
- Run humidity control methods that keep relative humidity low.
- Remove saturated contents that can trap hidden water.
- Improve airflow across framing, subfloors, and cavities.
You should also separate porous items from wet surfaces so you can reduce wet contact points. Inspect corners, gaps, and concealed assemblies where moisture lingers.
When you act early and stay consistent, you help your crew maintain a cleaner, safer restoration environment. That approach supports your team and keeps the drying process on track without inviting microbial growth.
Monitor Moisture Until Materials Stabilize
You should track moisture levels in each affected material with calibrated meters at regular intervals.
Record readings until the values stop declining and match the expected dry standard for the material.
Confirm stabilization before you remove equipment or close the drying process.
Moisture Level Tracking
Moisture levels should be tracked continuously until affected materials stabilize at acceptable dry standards. You’ll use moisture sensors and tracking techniques to record readings in framing, drywall, subflooring, and insulation, giving your team a shared baseline.
Consistent logs help you spot slow-drying zones early and adjust airflow or dehumidification without guesswork.
- Measure at the same points each visit.
- Compare readings to adjacent dry areas.
- Note temperature and humidity alongside data.
- Keep intervals short enough to show trends.
When you stay methodical, you protect the structure and support everyone working on the restoration. Reliable tracking keeps you aligned with the drying plan and reduces uncertainty during each inspection cycle.
Stabilization Verification
Stabilization is confirmed when moisture readings stop trending downward and remain within acceptable dry limits across consecutive checks.
You verify this through repeated moisture assessment with calibrated meters, logging values at the same locations, depths, and intervals.
Use stabilization techniques such as controlled airflow, dehumidification, and temperature management to prevent rebound moisture and to support even drying.
When materials hold steady for several readings, you can document them as stable and move from active drying to validation.
Keep checking framing, subfloors, and wall cavities until each area matches the target range.
This disciplined process helps you and your team stay aligned, reduces uncertainty, and confirms the structure’s readiness for the next restoration step.
Repair Damaged Materials and Building Systems
After drying stabilizes, you should assess structural damage to framing, sheathing, finishes, and load-bearing components for warping, delamination, corrosion, or loss of capacity.
You’ll then replace or repair compromised materials based on measured damage and code requirements.
Next, you should restore building systems, including electrical, plumbing, HVAC, and insulation, before returning the property to service.
Assess Structural Damage
Once the structure is dry enough to inspect, you need to assess every affected component for loss of strength, distortion, corrosion, delamination, or microbial damage.
Your damage assessment should document conditions that could compromise structural integrity and guide targeted repairs. Walk the site methodically and compare each material to its expected performance.
- Check framing for warping, splitting, or crushing
- Inspect sheathing, subfloors, and finishes for softening or separation
- Review connectors, fasteners, and plates for rust or loosening
- Mark areas that need replacement, reinforcement, or further testing
Use moisture readings, probing, and visual verification to confirm hidden damage.
When you work with a careful, consistent team, you help protect the building and support everyone relying on it.
Restore Building Systems
Replace damaged materials and restore affected building systems in a controlled sequence so the structure regains its designed performance. You’ll remove compromised drywall, insulation, trim, and flooring, then verify hidden cavities are dry before closing walls.
Next, you’ll inspect electrical, plumbing, HVAC, and drainage components for corrosion, leaks, and unsafe connections. Protect foundation integrity by checking slab edges, sill plates, and anchorage points for moisture-related movement.
Evaluate insulation impact because wet or compressed insulation reduces thermal resistance and can trap residual moisture. Replace materials with code-compliant assemblies, seal penetrations, and recalibrate systems for balanced airflow and safe operation.
When you coordinate each trade carefully, you help your property recover as a unified, resilient system, and you belong to the process of rebuilding with confidence.
Call a Water Damage Restoration Team
Contact a water damage restoration team as soon as possible to assess the extent of the flooding and start structural drying. Their emergency response crew can stabilize your property, document damage, and coordinate with your insurer for insurance claims.
You’ll benefit from a team that uses moisture meters, thermal imaging, and high-capacity extraction to prevent secondary damage.
- Inspect wet structural materials
- Remove standing water fast
- Set dehumidifiers and air movers
- Verify dry targets with readings
When you call trained professionals, you join a process built for speed, accuracy, and accountability. They’ll explain each step, protect affected areas, and keep you informed so you know what’s happening.
Quick action helps reduce mold risk, preserves materials, and keeps your restoration on schedule.
Frequently Asked Questions
How Long Does Structural Drying Usually Take?
Usually, you’ll need 3–5 days, but severe saturation can take longer. Your drying techniques and drying equipment, along with material type, airflow, and humidity, determine speed. You’ll know you’re progressing when moisture readings steadily drop.
Can I Stay in the Property During Drying?
You can sometimes stay in the property during drying, but drying safety depends on the property assessment. You’ll need safe access, low contamination, and controlled equipment noise. Your restoration team should confirm it.
Will Insurance Cover Structural Drying Costs?
Usually, yes, but it can feel like maneuvering through a financial storm. You’ll need to check your insurance policies and coverage limits, because structural drying costs are often covered only when the loss is sudden and accidental.
What Health Risks Remain After Flooding?
After flooding, you face mold growth, water contamination, bacteria, and airborne particulates that can trigger asthma, skin irritation, and gastrointestinal illness; you’ll reduce risk by drying fast, disinfecting surfaces, and discarding porous materials.
Do Personal Belongings Need Separate Drying?
Yes—your personal items often need separate drying. You’ll use specific drying techniques for fabrics, paper, and electronics; wet and dry objects, fragile and resilient materials. That helps you protect belongings and prevent further damage.
Final Thoughts
When you act fast on structural drying for flooded property restoration, you cut the chance of long-term damage. In many water-loss events, mold can begin growing within 24 to 48 hours, so every hour matters. You’ll need to extract water, map moisture, dry framing and finishes, and keep monitoring until materials stabilize. If you see hidden moisture or warped materials, call a restoration team right away to protect the building and speed recovery.
Recent Posts
3 Best Mold Prevention Drying Tips
When moisture lingers, mold can start growing in less than 48 hours, so your drying
What Is Structural Drying After Flooding
The majority of flood damage problems can worsen when moisture remains trapped in building materials,
5 Tips for Structural Drying After Flooding
After a flood, you need to act fast, or moisture can continue spreading behind walls