Contents
Imagine discovering a hidden leak in your home, much like finding a crack in a dam—if left unchecked, it can lead to disaster. Mold growth can quickly escalate if not addressed properly. To ensure a safe cleanup and prevent future issues, you need to follow specific steps, including evaluating the situation, gathering safety gear, and more. Understanding these vital measures can help you maintain a healthy living environment. What comes next might surprise you.
Key Takeaways
- Wear appropriate PPE, including gloves, goggles, and a respirator, to protect yourself during mold cleanup activities.
- Contain the affected area with plastic sheeting and create negative air pressure to prevent spore spread.
- Remove contaminated materials safely, sealing them in plastic bags labeled for hazardous waste disposal.
- Thoroughly clean surfaces with a suitable disinfectant like hydrogen peroxide or vinegar, ensuring all mold is removed.
- Maintain indoor humidity levels between 30% and 60% to prevent future mold growth and ensure proper ventilation.
Assessing the Mold Situation
When you suspect mold in your home, it’s essential to assess the situation thoroughly before taking any action. Start by identifying mold types, as different species can pose varying health effects. Common indoor molds include Aspergillus, Penicillium, and Stachybotrys (black mold), all of which can trigger allergic reactions, respiratory issues, and other serious health concerns.
Inspect areas prone to moisture, such as bathrooms, kitchens, and basements. Look for visible signs like discoloration or a musty odor. Don’t forget to check hidden spaces like behind drywall or under carpets.
Document your findings, noting the extent of the mold and any potential health symptoms you or your family members may experience. This assessment will guide your next steps and help you decide if professional help is needed.
Gathering Necessary Safety Gear
Before you start mold cleanup, it’s vital to gather the right safety gear.
You’ll need essential personal protective equipment, such as gloves and goggles, along with respiratory safety gear to protect yourself from inhaling spores.
Additionally, having a checklist of cleaning supplies will ensure you’re fully prepared for an effective cleanup.
Essential Personal Protective Equipment
Choosing the right personal protective equipment (PPE) is essential for effective mold cleanup. To protect yourself from harmful mold spores and potential skin irritation, you’ll need a few crucial items.
Start with gloves made from nitrile or latex to shield your hands from direct contact with mold. A full-body suit can prevent spores from settling on your skin and clothing.
Don’t forget protective eyewear—safety goggles can help you avoid irritation from airborne spores. Finally, consider a face mask to reduce exposure to mold particles.
Having the right PPE enhances your safety and fosters a sense of community among those tackling mold issues together. By prioritizing your protection, you contribute to a healthier environment for everyone involved.
Respiratory Safety Gear
A reliable respirator is vital for protecting your lungs during mold cleanup. Respiratory hazards like mold spores can trigger allergies, asthma, and other respiratory issues. To ensure your safety, opt for an N95-rated respirator or higher, as these filters effectively capture airborne particles.
Don’t forget to check the fit; a proper seal is essential for maximum protection. Along with your respirator, consider using safety goggles to shield your eyes from irritants. Wearing long sleeves and gloves also forms a complete protective barrier.
These protective measures safeguard your health and foster a sense of community responsibility in mold cleanup efforts. Remember, prioritizing safety ensures that you and your loved ones remain healthy throughout the process.
Cleaning Supplies Checklist
With the right respiratory safety gear in place, you’re ready to gather the cleaning supplies necessary for effective mold cleanup.
Start with a sturdy scrub brush and sponges for scrubbing surfaces. You’ll also need a bucket for mixing solutions. For mold removal techniques, consider using a mixture of water and detergent or a commercial mold cleaner.
Cleaning product recommendations often include hydrogen peroxide or vinegar, both of which are effective and safe options. Don’t forget heavy-duty gloves, goggles, and a disposable mask to protect yourself during the process.
Finally, have trash bags on hand for disposing of contaminated materials. By assembling these items, you’ll be well-prepared to tackle mold cleanup efficiently and safely.
Containing the Affected Area
To effectively contain the affected area during mold cleanup, start by sealing off the contaminated space. This step is essential in preventing mold spores from spreading to other parts of your home.
Here are some mold containment methods you can use to create effective barriers:
Plastic Sheeting: Use heavy-duty plastic sheeting to cover doorways and vents.
Duct Tape: Secure the edges of the plastic sheeting with duct tape to ensure an airtight seal.
Negative Air Pressure: If possible, set up a fan to create negative pressure, which helps keep spores contained.
Warning Signs: Post clear signs outside the affected area to inform others of the mold hazard.
Removing Moldy Materials
To effectively remove moldy materials, you first need to identify all affected areas in your home.
Once identified, make certain you follow safe disposal techniques to prevent further contamination, and always wear appropriate protective gear to safeguard your health.
This approach helps remove mold while minimizing the risk of exposure during the cleanup process.
Identify Affected Areas
Identifying affected areas is essential for effective mold remediation, as it allows you to pinpoint where mold growth has occurred and what materials need removal.
You can utilize various mold identification techniques to assess the situation better. Look for common mold types like black mold, aspergillus, and cladosporium, which can often thrive in damp environments.
Here are four key steps to identify affected areas:
Visual Inspection: Check walls, ceilings, and floors for discoloration or staining.
Smell Test: Detect musty odors that may indicate hidden mold.
Moisture Assessment: Use a moisture meter to find damp spots.
Surface Sampling: Collect samples for lab analysis if needed.
Safe Disposal Techniques
When dealing with moldy materials, following safe disposal techniques is essential to prevent further contamination and health risks.
Start by sealing moldy items in plastic bags to contain spores. Label the bags clearly as “Moldy Waste” to ensure proper handling. If you’re discarding porous materials like carpets or drywall, it’s best to remove them in whole pieces to minimize spore release.
Always check your local waste management guidelines for specific disposal instructions, as some areas may require special handling for hazardous materials.
After disposal, clean the area thoroughly with a mold-inhibiting solution.
Protective Gear Usage
Before you start removing moldy materials, it’s essential to wear appropriate protective gear to safeguard your health. This ensures you’re shielded from harmful spores and chemicals.
Here are four critical protective gear types you should consider:
- N95 Respirator Mask – Filters out small particles, protecting your lungs.
- Goggles – Prevents eye irritation from mold spores.
- Gloves – Use disposable or rubber gloves to avoid skin contact.
- Protective Clothing – Wear long sleeves and pants to cover your skin.
After use, follow proper gear cleaning methods to reduce contamination risk. Wash reusable items thoroughly and dispose of single-use gear safely.
Cleaning and Disinfecting Surfaces
Cleaning and disinfecting surfaces effectively is vital in preventing mold growth and ensuring a healthy environment. Start by identifying affected areas and using appropriate mold removal techniques.
It’s imperative to wear protective gear during this process to minimize exposure. For hard surfaces, use a solution of water and a suitable disinfectant. Look for disinfectant solutions that contain ingredients like hydrogen peroxide or vinegar, as these can effectively kill mold spores.
Scrub the surfaces thoroughly, focusing on corners and crevices where mold tends to hide. Afterward, rinse the area with clean water to remove any residue and verify that no mold remains.
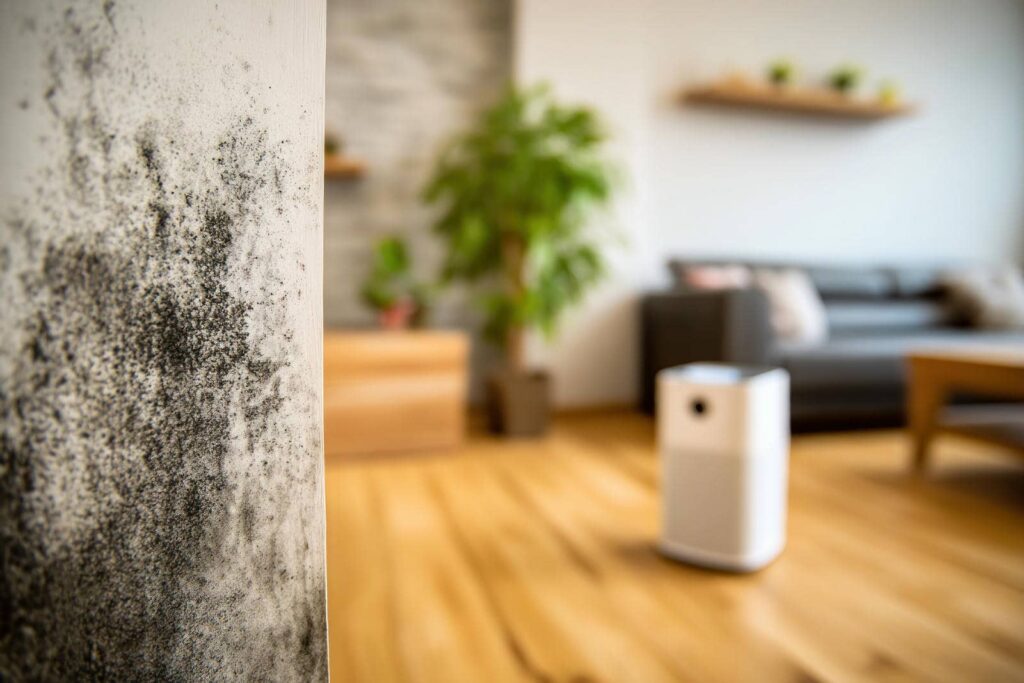
Drying and Dehumidifying the Area
To effectively prevent mold growth, drying and dehumidifying the area should be your immediate priority after any water damage or high-humidity events.
Quick action reduces moisture levels and inhibits mold spores from thriving. Here are some effective drying techniques you can implement:
Increase Air Circulation: Use fans to promote airflow and speed up the drying process.
Use a Dehumidifier: Consider options like portable dehumidifiers to extract moisture efficiently from the air.
Open Windows and Doors: If the weather permits, open windows to allow fresh air to circulate and help lower humidity levels.
Remove Wet Materials: Discard any soaked items like carpets or drywall, as they can retain moisture and foster mold growth.
Implementing Prevention Strategies
While it’s essential to address existing mold issues, implementing prevention strategies is equally important to ensure your space remains mold-free.
Start by incorporating mold-resistant materials in your home, especially in areas prone to moisture, like bathrooms and kitchens. These materials can considerably reduce the likelihood of mold growth.
Next, establish a robust humidity control system. Aim to keep indoor humidity levels between 30% and 60%. You can achieve this by using dehumidifiers, ensuring proper ventilation, and regularly checking for leaks.
Don’t forget to inspect your home regularly for any signs of water damage or leaks, as early detection is key.
Lastly, maintain clean gutters and downspouts to direct water away from your foundation.
Frequently Asked Questions
Can I Remove Mold Without Professional Help?
Yes, you can remove mold without professional help. Utilize effective mold removal techniques and DIY mold solutions like vinegar or baking soda. Just make sure you wear protective gear and ventilate the area during the process.
How Long Does Mold Cleanup Typically Take?
Mold cleanup typically takes a few hours to several days, depending on mold growth timelines and cleanup duration factors like the extent of contamination and the materials involved. You can make it manageable with careful planning.
Is Mold Safe to Breathe During Cleanup?
You’d think breathing mold during cleanup is harmless, but it’s not. Mold can lead to serious respiratory issues and health problems. Always wear protective gear and ensure proper ventilation to keep yourself safe while tackling mold.
What Types of Mold Are Most Dangerous?
You should be aware that toxic mold types, like Stachybotrys chartarum and Aspergillus, can pose serious health risks. Identifying these molds is essential for protecting yourself and your environment from potential harm.
Will Mold Return After Cleanup if Untreated?
When you clear the weeds from a garden, you must also nourish the soil. If you neglect mold regrowth factors after using mold removal techniques, those spores will return, thriving in damp conditions.
Conclusion
Addressing mold isn’t just about cleanup; it’s about prevention. Remember, “an ounce of prevention is worth a pound of cure.” By following the steps outlined—assessing the situation, using proper safety gear, containing the area, and implementing effective drying and dehumidification strategies—you’ll rid your space of mold and create a healthier environment. Stay vigilant and proactive to keep mold at bay, ensuring your home remains safe and comfortable for everyone.
Recent Posts
What Are Best Practices for Commercial Mold Inspection?
When it comes to commercial mold inspection, understanding the implications of mold growth is vital
What Are Effective Mold Remediation Techniques?
When it comes to mold remediation, understanding the root causes and effective techniques is vital.
Top 3 Mold Remediation Techniques After Water Damage
After experiencing water damage, addressing mold growth promptly is vital. You’ll need to start by