
Contents
When you experience water damage, a mold inspection begins with identifying moisture sources and evaluating affected areas for signs of mold growth. Inspectors look for discoloration and warping while using moisture meters to check humidity levels. They also examine hidden spaces for lingering moisture, ensuring no issues are overlooked. To further understand the situation, air and surface sampling techniques are employed. But what happens next after these initial findings?
Key Takeaways
- Inspect the property to identify the source of water intrusion and assess affected areas for signs of moisture and damage.
- Conduct a visual inspection for mold growth in moisture-prone areas like basements, bathrooms, and around plumbing fixtures.
- Use air and surface sampling techniques to collect mold spores from the environment and contaminated surfaces for analysis.
- Analyze collected samples in a lab to determine the types and concentrations of mold present, noting any health risks.
- Develop a mold remediation plan that includes containment, cleaning, and prevention strategies to address moisture issues and ensure safety.
Initial Assessment of Water Damage
How can you effectively evaluate the extent of water damage in your property? Start with a thorough inspection process.
Begin by identifying the source of the water intrusion, whether it’s a burst pipe, roof leak, or flooding. Next, examine affected areas, including walls, floors, and ceilings. Look for discoloration, swelling, or warping, as these are key indicators of water damage.
Use a moisture meter to measure humidity levels in materials, as this will help you gauge the severity of the damage. Don’t forget to check hidden spaces, like behind appliances or inside cabinets, where moisture might linger unnoticed.
Document your findings with photos and notes for reference. This assessment lays the groundwork for remediation efforts, ensuring you address all affected areas.
Visual Inspection for Mold Growth
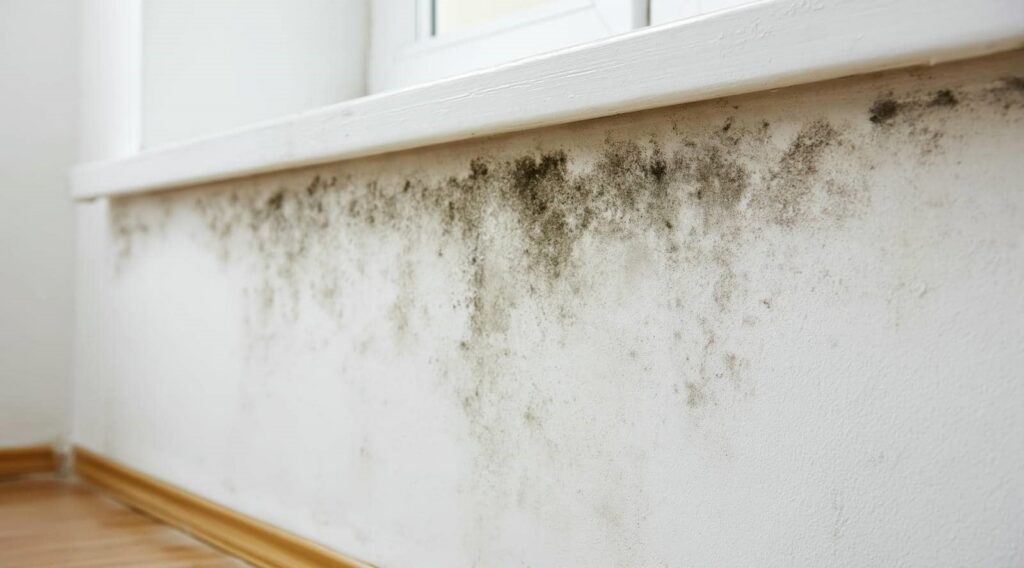
While conducting a visual inspection for mold growth, focus on areas that are most susceptible to moisture and dampness. Start in spaces like basements, bathrooms, and around plumbing fixtures where mold types such as black mold or white mold thrive.
Use inspection techniques like checking for discoloration on walls, ceilings, and floors, which often indicates hidden mold. Pay close attention to areas behind appliances, under sinks, and around windows.
Look for water stains, peeling paint, or warped surfaces that may suggest prolonged moisture exposure.
Don’t forget to inspect HVAC systems, as they can circulate mold spores throughout your home.
Air and Surface Sampling Techniques
After completing a thorough visual inspection, it’s important to confirm the presence of mold through air and surface sampling techniques. These methods help you assess air quality and identify mold spores that may not be immediately visible.
For air sampling, you’ll use specialized equipment to capture airborne mold spores, providing a clear picture of the indoor environment. This process often involves a pump drawing air through a filter, which later gets analyzed for mold concentrations.
Surface sampling, on the other hand, involves collecting samples from potentially contaminated areas, such as walls or ceilings. You can use swabs or tape lifts to gather these samples, which can reveal the types of mold present.
Laboratory Analysis of Samples
Once you’ve collected air and surface samples, laboratory analysis plays a crucial role in identifying the specific types and concentrations of mold present.
During sample testing, trained technicians analyze the collected samples under controlled conditions. They use techniques like culture plating and microscopy to isolate mold spores, allowing for accurate identification.
The laboratory may perform quantitative analysis, determining the concentration of mold spores in the air or on surfaces. This data helps you understand the severity of the mold issue, guiding your next steps.
It’s essential to know which mold species are present, as some can pose health risks.
The results of the analysis are typically presented in a detailed report. This report highlights the types of mold found and provides insight into potential sources and conditions that may have contributed to mold growth.
With this information, you’ll be better equipped to address the situation effectively.
Developing a Mold Remediation Plan
With the results from the laboratory analysis in hand, you can now begin developing a mold remediation plan tailored to address the specific conditions present in your environment.
Start by identifying the affected areas and determining the extent of the mold growth. Effective remediation techniques may include containment, air filtration, and surface cleaning.
As you create your plan, incorporate mold prevention strategies to minimize future risks. This could involve addressing moisture issues, improving ventilation, and using mold-resistant materials during repairs.
It’s essential to establish clear roles and responsibilities if you’re working with a team, ensuring everyone understands the steps required for effective remediation.
Document your plan thoroughly, including timelines and safety measures, to foster a sense of belonging among all involved.
Frequently Asked Questions
How Long Does a Mold Inspection Typically Take?
A mold inspection typically takes one to three hours, depending on your property’s size and complexity. During this inspection process, professionals assess potential mold growth, ensuring a thorough evaluation for safety and prevention measures.
Can I Stay in My Home During the Inspection?
You can typically stay in your home during the evaluation, but ensure mold safety by avoiding affected areas. Inspectors may recommend temporary relocation if conditions pose health risks or if extensive remediation is necessary.
What Are the Costs Associated With Mold Inspection?
Mold inspection costs typically range from $300 to $600. Inspection pricing factors include property size, location, and the complexity of the potential mold issues. Understanding these elements helps you budget effectively for necessary evaluations.
Is Mold Inspection Necessary After Every Water Damage Incident?
Yes, mold inspection’s essential after every water damage incident. Even minor leaks can promote mold growth, leading to health risks and structural issues. Early detection through inspection helps ensure your environment remains safe and healthy.
Will Insurance Cover Mold Inspection Fees?
Insurance might cover mold inspection fees, but it depends on your policy. Always check for specific insurance coverage regarding mold remediation costs to ensure you’re protected and supported through this challenging situation.
Recap
In summary, a thorough mold inspection after water damage is essential to safeguard your health and property. Many homes in the U.S. have mold, often linked to water issues. This underscores the importance of identifying and addressing mold growth promptly. By understanding the inspection process and its significance, you can take proactive steps to mitigate risks and ensure a safe, healthy living environment for you and your loved ones.
Recent Posts
3 Best Mold Prevention Drying Tips
When moisture lingers, mold can start growing in less than 48 hours, so your drying
Structural Drying for Flooded Property Restoration
When water invades a structure, both speed and strategy matter. Flooded property restoration starts by
What Is Structural Drying After Flooding
The majority of flood damage problems can worsen when moisture remains trapped in building materials,