
Contents
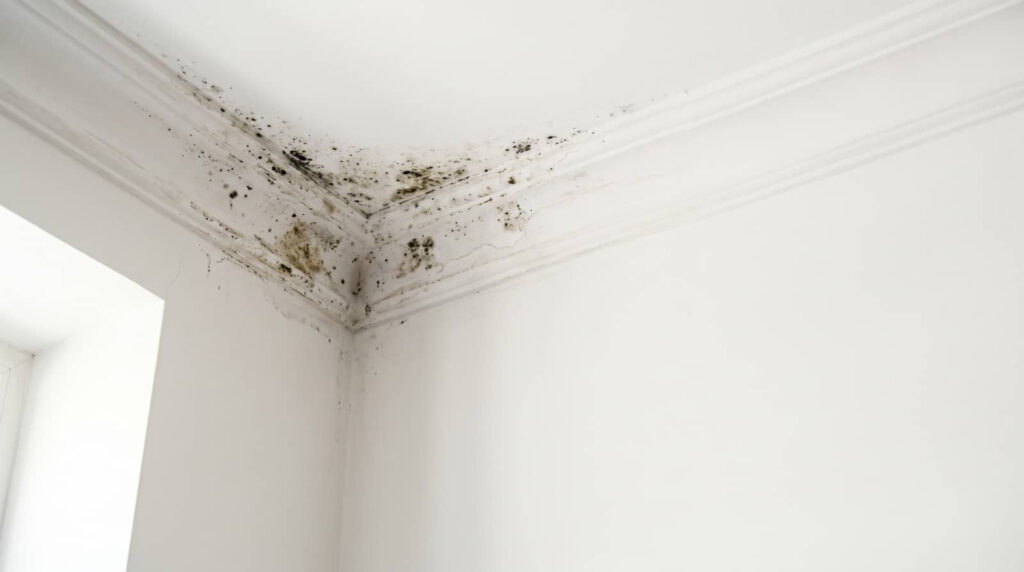
After water damage, you need to act fast to keep mold from spreading through your home. You’ll want to stop the leak, inspect hidden damp areas, dry materials quickly, and remove anything that can’t be saved. Then you can clean, disinfect, and control humidity so the problem doesn’t return. But the most effective steps depend on how far the damage has gone, and that’s where the details start to matter.
Key Takeaways
- Stop the water source immediately and contain the affected area to prevent mold from spreading.
- Inspect hidden spaces like behind baseboards and under flooring for moisture and hidden mold.
- Dry wet materials fast with fans, dehumidifiers, and ventilation, keeping humidity below 60%.
- Remove porous moldy materials safely, wearing gloves, eye protection, and an N95 respirator.
- Clean and disinfect remaining surfaces with EPA-registered products, then monitor for lingering moisture.
Stop the Leak and Contain the Area
Before you clean up mold, you need to stop the moisture source and isolate the affected area. Start with leak detection: check supply lines, roof penetrations, appliances, and drains, then shut off water or schedule repairs fast. If you can’t control the source, mold remediation won’t hold.
Next, set up area containment with plastic sheeting, tape, and a sealed doorway to limit spore spread. Keep HVAC off in the zone if possible, and move clean items out before work begins. You’re not alone in this step; careful setup protects your space and the people who share it.
Use gloves and eye protection, and keep traffic through the area to a minimum until the leak is fixed and the space stays dry.
Inspect Hidden Mold Damage
Once the area is contained, inspect for hidden mold damage in places that trap moisture or stay out of sight. You should check behind baseboards, under flooring edges, inside wall cavities, and around plumbing penetrations.
Use mold detection techniques like visual scanning, moisture meters, and infrared cameras to find staining, warping, or cool damp zones. Don’t forget hidden moisture sources such as slow leaks, condensation on pipes, and soaked insulation.
If you notice a musty odor or discoloration, document the location and extent so your team can assess it together. You belong to a safer cleanup process when you catch these concealed problems early.
Careful inspection helps you identify the full impact of water damage before mold spreads further.
Dry Wet Areas Fast
Dry wet areas as quickly as possible to limit mold growth and structural damage. You should start by removing standing water, then run fans and open windows if outdoor humidity is low.
Use airflow techniques that move air across damp surfaces, not just around the room, so you dry walls, floors, and framing faster. Choose dehumidifier options sized for the space; a high-capacity unit works best in basements and larger rooms, while smaller units suit closets or isolated areas.
Check humidity often and keep it below 60% if you can. Move furniture slightly away from walls to let air circulate.
Stay consistent, because fast, even drying helps your team prevent lingering dampness and supports a safer, healthier home.
Remove Moldy Materials Safely
If mold has soaked into porous materials, you should remove them carefully instead of trying to clean them in place. Wear gloves, an N95 respirator, and eye protection, then seal the room from the rest of your home so spores don’t spread.
Bag affected drywall, carpet, insulation, and ceiling tiles before you carry them out. Keep the work area contained, and use ventilation strategies that exhaust air outdoors, not into shared spaces.
If you’re replacing finishes, choose mold resistant materials so your team can rebuild with less risk. Work methodically, avoid tearing material apart, and dispose of waste promptly.
Clean and Disinfect Surfaces
After you remove moldy materials, wipe away all contaminated residue from the remaining surfaces.
Then apply an appropriate disinfecting solution and keep the contact time specified on the product label.
Finally, dry the surfaces thoroughly so moisture doesn’t support new mold growth.
Remove Contaminated Residue
Once you’ve removed porous materials that can’t be salvaged, scrub all remaining surfaces to eliminate contaminated residue and then disinfect them with an appropriate product.
You should work in small sections so you can see where mold types may still cling to framing, tile, or metal. Use a stiff brush, detergent, and clean water to lift grime, biofilm, and spores before they spread.
Rinse thoroughly and dry surfaces fast, because lingering moisture can elevate health risks and let residue return. Wear gloves, eye protection, and an N95 respirator so you stay safe with the rest of your team.
Check corners, joints, and hidden edges carefully, since missed spots often harbor contamination. When the surface looks clean, keep airflow moving and monitor it for any remaining staining or odor.
Apply Disinfecting Solution
Spray or wipe the cleaned surface with an EPA-registered disinfecting solution that’s approved for the material you’re treating, and keep the area wet for the full contact time listed on the label. You’ll protect shared spaces when you use the right product and follow directions exactly.
This step strengthens mold prevention strategies by reducing viable spores left after cleanup and supporting long-term control.
- Match the disinfectant to drywall, wood, metal, or tile.
- Read dilution, dwell time, and safety instructions first.
- Use clean cloths or sprayers to avoid cross-contamination.
- Verify disinfectant effectiveness by respecting the label’s contact time.
Work methodically, cover every affected surface, and replace solution if it becomes visibly dirty.
Consistent technique helps your team stay aligned and keeps the area safer.
Dry Surfaces Thoroughly
Thoroughly dry every cleaned and disinfected surface with clean towels, fans, or dehumidifiers so moisture doesn’t linger and mold can’t rebound. You’ll protect your space by checking hidden areas like baseboards, cabinet interiors, and wall cavities, where dampness often hides.
Improve air circulation by opening doors and windows when weather allows, then aim airflow across wet materials instead of at one spot. Use moisture meters if you have them, and keep drying until readings return to normal.
Stay disciplined with moisture control, because even slight dampness can restart contamination. If you’re working with a team, coordinate passes so everyone knows which zones still need drying.
When surfaces feel dry and stay dry, you’ve made real progress toward a healthier shared environment.
Lower Humidity to Stop Mold Return
Keeping indoor humidity low is one of the most effective ways to stop mold from coming back. You can keep your space safer by using humidity control and steady moisture monitoring after cleanup. Aim for 30% to 60% relative humidity, and check problem rooms daily.
Use a dehumidifier in damp areas, run exhaust fans during showers and cooking, and keep vents clear so air moves freely.
- Track indoor readings with a hygrometer.
- Empty dehumidifier tanks before they overflow.
- Seal window leaks and basement gaps.
- Keep furniture a few inches from walls.
When you stay consistent, you help your home dry faster and support a healthier environment for everyone who lives there.
Know When to Call a Mold Pro
If mold keeps returning even after you’ve lowered humidity and cleaned affected areas, it may be time to call a mold remediation professional.
You should also contact one if the affected space exceeds 10 square feet, you smell persistent mustiness, or you notice warped drywall, hidden leaks, or HVAC contamination.
A pro can inspect materials, contain spores, and verify moisture levels with proper equipment. That matters for mold health, especially if anyone in your home has asthma, allergies, or immune concerns.
You’ll also get targeted prevention strategies, including drying timelines, ventilation fixes, and material replacement guidance.
When you act early, you protect your space, reduce repeat damage, and join a group of homeowners who handle moisture problems before they spread.
Frequently Asked Questions
How Soon Should Mold Be Tested After Water Damage?
You should test for mold within 24 to 48 hours after water damage if surfaces stay damp. Use mold testing methods during post water remediation, so you catch growth early, protect your space, and restore confidence.
Can Mold Grow Inside Walls After They Look Dry?
Yes, you can have mold growth inside walls even when they look dry, because moisture retention may persist in insulation or framing. You should inspect hidden areas, dry materials fully, and test promptly to protect your home.
Is Bleach Safe for All Mold Cleanup Surfaces?
No, bleach isn’t safe for all mold cleanup surfaces. You should check surface safety first and use bleach alternatives on porous materials, wood, or fabric. You’ll protect your space and improve results.
What Health Symptoms Suggest Hidden Mold Exposure?
You might dismiss symptoms as allergies, but hidden mold exposure can cause persistent coughing, wheezing, headaches, fatigue, sinus congestion, and skin irritation. Use mold detection methods to reduce health risks and protect your home’s comfort.
How Long Does Mold Remediation Usually Take?
You’ll usually finish mold remediation in 1–5 days, though time factors like damage size, moisture levels, and remediation methods can extend it. You’re not alone; your team will inspect, remove, dry, and verify safely.
Final Thoughts
If you want mold to behave, don’t give it a damp kingdom to rule. Stop the leak, dry everything fast, and remove contaminated materials before spores get too comfortable. Clean and disinfect like you mean it, then keep humidity below 60% so the problem doesn’t stage a comeback. If hidden growth keeps lurking or the damage is extensive, call a mold pro. Your walls shouldn’t need a biology lesson, and neither should you.
Recent Posts
What Is Storm Damage Mold Remediation?
When a storm leaves your building a little worse for wear, mold can quietly become
3 Best Flooded Basement Cleanup Tips
After a storm, you walk into your basement and find two inches of water around
What to Do After Basement Flooding
When water sloshes across your basement floor, soaking boxes, drywall, and belongings, every minute counts.